Menu for Hope VI : French gourmet delicacies

By Mélanie, on Monday, December 14, 2009


(Pour les non-anglophones, une explication est fournie à la suite de mon message.)

Dear Readers,

This is a very special occasion for me. I know that I have not been very active on this blog lately (well, ok, 4 months is maybe a little more than “lately”), but you’re always there for the subjects closest to my heart.
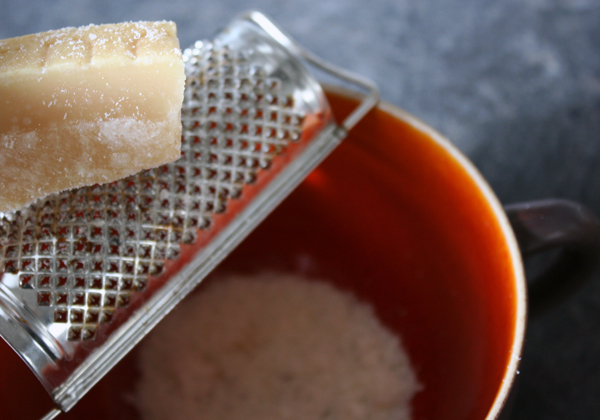
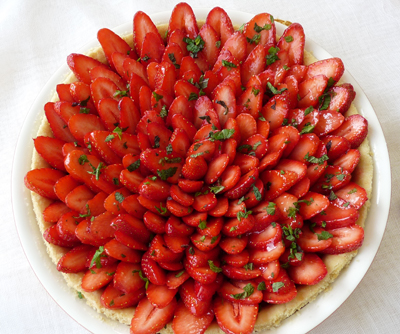
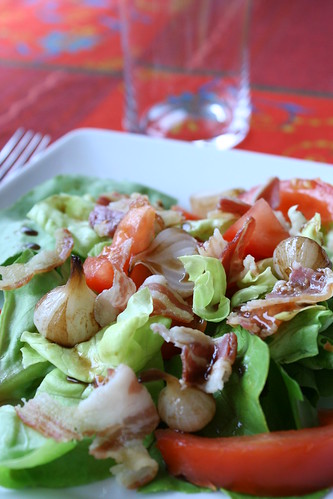
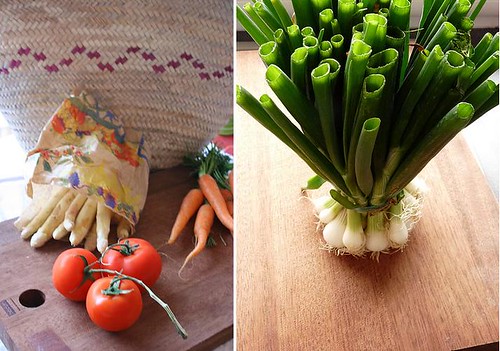
My last entry was meant to share with you my respect for locally grown, fresh, natural produces, and the hard work of farmers and producers. This helps me to trust food again, and accept that it represents life.

And this is the most important point: yes, food is life. But millions of people in the world don’t have access to the food they need. We can’t let them starve without doing anything.
I’ve felt concerned about this subject ever since I saw this campaign from Action against Hunger in 1998 (their website is there in English, or in French).

So of course, the sixth edition of the Menu for Hope, started by Chez Pim, is a wonderful occasion for everyone, including you, to win a food related prize while feeling good about raising money for a great cause!


Menu for Hope is an annual fund raising campaign that support the UN World Food Programm. As Pim explains, “each December, food bloggers from all over the world join the campaign by offering a delectable array of food-related prizes for the Menu for Hope raffle. Anyone – and that means you too – can buy raffle tickets to bid on these prizes. For every $10 donated, you earn one virtual raffle ticket to bid on a prize of your choice. At the end of the two-week campaign, the raffle tickets are drawn and the results announced on Chez Pim.”
For more details on this fundraiser, please visit Chez Pim .
You can make your (tax-deductible) donation online through FirstGiving. We, bloggers, never touch the money. But we will send to the winners some delicious packages, such as :

A basket full of French Gourmet Delicacies (a 80$ value).
Bid Item Code : EU28


Start your culinary travel in Brittany with hand harvested fleur de sel from Guérande and sea salt toffees, and continue in Burgundy with this 3 kinds of Dijon mustard from Edmond Fallot. In addition to the classical Dijon mustard and the mustard seeds, the tarragon perfumed one will add an unexpected touch of color to your dressing .
You’ll also find a beautiful box of Marco Polo tea from the famous Mariage Frères (yes, the one Blair’s mother brought back from Paris on Monday’s episode of Gossip Girl), along with heart shaped sugars.
And of course, you wouldn’t think of a box without chocolate! You’ll find 3 different kinds of Valrhona dark (Caraïbe and Manjari Orange) and milk chocolate (Jivara pecan) (total 400g), as well as a box of pure cocoa powder. I don’t need to tell you that Valrhona is THE chocolate used by the best pastry chefs in the world. Once you’ll taste them, you’ll know why.

This prize ships worldwide.

I have no doubt you’ll enjoy it. Believe me, the toughest will be to do without them once the packages are finished!


Please go to the Firstgiving Donation Site to bid on this. Last year, Menu for Hope raised about $90,000. Help us do even better this year! You can check David's site to find out the other bid item for the European region.

Thank you so much for your support!

(A little explanation in French, and you’ll find the bidding instructions at the bottom of this post.)


Ce message est une participation à Menu For Hope. C'est une grande campagne de récolte de fond pour le programme alimentaire de l'ONU, pour financer leur projet "Purchase for Progress" (brochure en français).

Pour recueillir un maximum de dons, cette campagne prend la forme d'une grande loterie : tous les ans les bloggeurs culinaires du monde entier se "rassemblent" virtuellement pour offrir des lots à gagner.
Chacun d'entre vous peut participer sous la forme de dons, qui vont permettent d’avoir une chance de gagner un des lots. Chaque don de 10$ (environ 7€) donne une chance. Il suffit de préciser le code du lot qu’on souhaite gagner dans le commentaire du site de donation Firstgiving. Le code de mon lot est EU28.
De toute manière, ce qu'il faut garder à l'esprit, c'est que même si vous ne gagnez pas, ce n'est pas de l'argent perdu : vous avez aidé à lutter contre la faim dans les pays en voie de développement.

Il faut être très clair, nous (bloggeurs) ne touchons rien sur votre participation. Les dons sont récoltés par un organisme contrôlé et sont directement versés à l'ONU. Je n'ai rien à gagner. J'espère juste que mon lot vous plaira et vous incitera à donner. Aidez-nous à dépasser les 90 000$ récoltés l'année dernière.

Alors justement, ce lot.... Cette année, j'offre la possibilité de gagner un coffret composé de plusieurs luxueux produits français :
Un sachet de 250g de fleur de sel de Guérande.
Pour continuer en Bretagne, une boite de caramel au beurre salé
Dijon maintenant, avec trois pots de moutarde Edmont Fallot. Outre la moutarde de Dijon classique et celle avec les graines, vous pourrez varier les plaisirs et surprendre vos invités avec une moutarde verte, parfumée à l'estragon.
Vous trouverez également une boite du thé star de Mariage Frère, le Marco Polo
Pour l'accompagner, ces jolis sucres blancs et roses en forme de cœur (Canasuc)
Et bien sur, du chocolat! Vous pourrez gouter 3 sortes de chocolat Valrhona, le Jivara Pécan (lait), Manjari Orange (noir) et Caraïbe. Le tout à accompagner d'un chocolat chaud à base de Valrhona pur cacao...

Croyez moi, dans tout ca, le plus dur sera de s'en passer une fois les paquets finis! J'espère que vous en profiterez bien...


Bid Item Code : EU28


To Donate and Enter the Menu for Hope Raffle

Here's what you need to do:
1. Choose a bid item or bid items of your choice from our Menu for Hope main bid item list.
2. Go to the donation site at Firstgiving and make a donation.
3. Please specify which bid item you'd like in the 'Personal Message' section in the donation form when confirming your donation. You must write-in how many tickets per bid item, and please use the bid item code.
Each $10 you donate will give you one raffle ticket toward a bid item of your choice. For example, a donation of $50 can be 2 tickets for EU01 and 3 tickets for EU02 - 2xEU01, 3xEU02.
4. If your company matches your charity donation, please check the box and fill in the information so we could claim the corporate match.
5. Please check the box to allow us to see your email address so that we can contact you in case you win. Your email address will not be shared with anyone.


La suite, please

At the market...

By Mélanie, on Monday, November 30, 2009

Hi!
First, I'd like to thank you for your messages, showing me that you were waiting for me to post again. But I've got to re-adjust. I think I'm in the right direction. Even though I don't have a recipe, I just wanted to share this with you...

Don't you think those vegetables are the most beautiful thing?
I don't mind waiting in line for 30 minutes at Joel Thiebault's stand as I'm in contemplation of his various produces.
So I came back with 3 kind of beets, 4 kinds of carrots, turnips, squash...
Doesn't this red beet look like a mouse?

And I could not resist those flowers. They could brighten up any rainy day!


La suite, please

Summer Fest Part 2 with a clafoutis

By Mélanie, on Monday, August 10, 2009

web1

Today, we are celebrating two events :

- I am happy to announce that the "baby sister" of this blog is created! As I told you, this new blog is not at all about culinary experiences. I've often regretted not to know the city I live in better. So I'm going to visit Paris, take pictures, and every day, photo by photo, you'll be able to visit with me. During the week-ends, it will be more relaxing with beautiful sceneries of the French countryside, that my friend Claire will be sharing with you. The blog's name is Country and the City, and I hope you'll visit regularly. Tell us if you like it!

- Back to the kitchen, and this is the second week of the Summer Fest 2009. This event is "a four-week celebration of fresh-from-the-garden food: recipes, growing tips, even tricks for storing and preserving summer’s best".
The co-creators of this event are : Maragret from A Way to Garden, Matt Armendariz of Mattbites, Jaden Hair of Steamy Kitchen, and Todd and Diane of White on Rice Couple, with guest appearances from Shauna and Daniel Ahern of Gluten-Free Girl, Simmer Till Done’s Marilyn Pollack Naron, and Paige Smith Orloff of The Sister Project.


This week is (almost was, as, once again, I'm waiting for the last days to finally post these!!)dedicated to stone fruit.

web3

Now, I'm not sure cherries are considered as stone fruits... I've never heard of a "stone fruit" category in France, but they have stone, they are in trees, so I hope it's right... At least there are some peaches in the recipe too.

In our garden, we have had difficulties with stone fruits. I love spring time, when the apricot tree and the cherry tree are blossoming. They have these small pale pink and white flowers, and when the wind blows, it looks like it's snowing. Just for that, it is worth having them. But, as you can see, our cherry tree is not very prolific. The roses climbing in the tree is much more!

web2

Fortunately, our local producer has lots of cherries, including Montmorency cherries, which are more on the sour side than the regular ones. They are perfect to include in this almond clafoutis.

web4

Summer fruit clafoutis
For 4 individual clafoutis

1 pound summer fruits (cherries, apricots, peaches...)
2 eggs
3 Tbsp butter, melted
1/2 cup milk
1/2 cup whipping cream
1/4 cup sugar + 2 Tbsp
3 Tbsp flour or cornstarch
1/3 cup almond flour
1/2 tsp vanilla extract

Grease the 4 ramekins with butter and sprinkle with a tablespoon sugar. Arrange the fruits inside.
Preheat oven to 350°F.
In a bowl, mix together the eggs with the sugar and the vanilla extract. Add eggs and butter. Add and mix in half flour, then cream. Add remaining flour and milk. Make sure there are no lump.
Pour on the fruits and bake for 40 minutes. Five minutes before the ending, sprinkle with the remaining tablespoon sugar.
Serve warm or at room temperature.

Clafoutis aux fruits d'été
Pour 4 clafoutis

500g de fruits (cerises, abricots, prunes, pêches)
2 oeufs
35g de beurre fondu
13 cl de lait
13 cl de crème liquide
50g de sucre + 2 cuillères à soupe
20g de farine ou de maizena
60g d'amandes en poudre
1/2 cuillère d'extrait naturel de vanille

Beurrez 4 ramequins et saupoudrez avec une cuillère de sucre. Disposez les fruits dans ces 4 plats.
Préchauffez le four à 180°.
Dans une jatte, fouettez les oeufs avec le sucre et la vanille. Ajoutez les amandes en poudre et le beurre, puis alternez avec la farine, le lait et la crème en mélangeant à chaque fois pour éviter la formation de grumeaux.
Versez cet appareil sur les fruits et faites cuire 40 minutes. Cinq minutes avant la fin de la cuisson, saupoudrez d'une dernière cuillère de sucre.
Servez tiède ou à température ambiante.
La suite, please

Mint & Strawberries in the simplest apparel

By Mélanie, on Tuesday, August 4, 2009

fraises3


This second recipe is a little late for the summer fest week. We're now talking about stone fruits, so I'm off subject here. But maybe you have a prolific mint like me & my mother do. Or maybe you bought a bunch for a recipe and you're left with a handful of leaves, no knowing what to do next. Well, here I am with the solution!
Ain't I nice?

pâte sucrée
you'd better say yes, have you seen this rolling pin?

This recipe is, once again, very simple to assemble. This is all about summer, and the last thing we want is to spend a whole sunny day inside, cooking... It's time to rest, to go to the beach or to discover the parks of your city. It's also time to enjoy the bright simplicity of fruits. Just a sablée crust and mint will make the sweet flavors of ripe strawberries stand out. There's no need for cream. No, I said no pastry cream. No whipped cream. Don't insist. I had doubts too. Then I tasted it. No doubts anymore. You can do it.

fraises2


About the tart crust : this is the fourth recipe on my blog. Whatever the recipe, please make it yourself and don't use a store-bought one. It's really easy, there's no reason to be afraid. Don't hesitate to put a lot of flour on your kitchen counter before rolling it. And if it breaks, it ok, just press it together in your pie form. There is NO comparaison between a store-bought crust and a homemade...

fraise1


Strawberry and mint tart

For the sugar crust
1 egg
1/3 cup + 1 Tbsp sugar
1 1/2 cup flour
1 stick butter
1 pinch salt

For the tart
1 1/2 pound strawberries
15 mint leaves
2 Tbsp currant jelly

First mix sugar, flour, salt and the butter for a few seconds. Mix in the egg and, with your hand palm, press the dough about 3 times, just until it forms a ball that holds together. Flatten into a disk and wrap in plastic wrap and refrigerate at least 1 hour and up to 1 day.
Preheat oven to 340°F.
Roll out dough into a on a floured surface with a floured rolling pin. Delicately fold the rolled dough in 4, to lift it easily, and unfold in the tart form. Prick bottoms all over with a fork and bake 15 minutes.

Once the crust cooled, arrange diced strawberries on top, in a concentric form.
In a small saucepan, heat the jelly with 1 Tbps water until liquid. Brush the strawberries with the jelly.
Slice thinly the mint leaves, and sprinkle over the pie.


Tarte aux fraises et à la menthe

Pour la pâte sucrée
1 oeuf
100g de beurre
200g de farine
80g de sucre
1 pincée de sel

Pour la tarte
700g de fraises
2 cuillères à soupe de gelée de groseilles
une quinzaine de feuilles de menthe

Mélangez quelques secondes le sucre, la farine, le sel et le beurre, le temps de former une pâte grumeleuse. Incorporez l'œuf. Fraisez (c’est l’action de travailler avec la paume de la main) rapidement et formez 1 boule de pâte. Aplatissez et enveloppez ce disque dans un film plastique pour reposer au frais pendant au moins 1 heures.
Préchauffez le four à 170°.
Farinez abondamment le plan de travail ainsi que le rouleau à pâtisserie, puis étalez la pâte sur 2 à 3 mm d'épaisseur. Pliez délicatement la pate en 4 pour la soulever plus facilement et depliez là dans le moule à tarte. Mettez à cuire 15 minutes.

Une fois le fond de tarte refroidi, arrangez les fraises coupées en lamelles de manière concentrique.
Dans une petite casserole, faites fondre la gelée avec un peu d'eau, et appliquez ce nappage sur les fraises.
Emincez finement la menthe, et disposez la sur la tarte.


La suite, please

Last call for summer fest

By Mélanie, on Monday, August 3, 2009

tastespotting

You know this feeling, when you're rushing through the airport, running and hoping you'll get in time before the plane takes off? The adrenaline is pumping, but deep down you know that you can make it, that, no matter how tired you are, it's going to be alright. You won't give up.
Well, that exactly how I feel right now. It's 2 a.m. in Paris and I want to post this recipe before the end of the day (US time. no, it's not cheating). To my regret, I have not participated to a lot of blog events (one, actually), but when I saw that Todd and Diane, of White on Rice Couple, collaborated to the Summer Fest 2009, I knew I wanted to be part of this.

geranium petit

This event is "a four-week celebration of fresh-from-the-garden food: recipes, growing tips, even tricks for storing and preserving summer’s best". Some people may think that they are not concerned because they live in an apartment. But if you have even a windowsill, you can have some fresh aromatic herbs at home.

web1

Because I grew up in a house with a garden, filled with stone fruits trees (apricots, peaches, cherries), berries, tomatoes, zucchini, and herbs (and LOTS of flowers...), this is something I really missed when moving to Paris.
Fortunately, I have now a balcony, and my first plantation was for a little corner of kitchen delights : rosemary, thyme, basil, etc...

thyme

But the easiest herb to grow is mint. It's almost like weeds, appearing in every corner of my jardinière. If you don't want this, you should plant it in a separate part. I don't mind though, because i really enjoy its fresh and peppery flavor during the summer. It will make a huge difference in a simple fruit salad, but really, when it's hot outside, you can just add it to anything!
I'm going to post a few (and sooo easy) recipes with mint to give you some ideas... There was the strawberry and watermelon smoothie.
This is a chilled cucumber soup, perfect as an appetizer, with some friends on a warm evening.

web3


Chilled mint and cucumber soup with shrimps
For 4 appetizers

1 large cucumber
1 yogurt or 1/2 cup buttermilk
10 mint leaves, washed
1 teaspoon salt
12 shrimps, cooked

In a blender purée cucumber and mint with buttermilk and salt until smooth (I start with one third of the cucumber and all the buttermilk, and then I add gradually the rest, so that the cucumber doesn't get stuck in my blender). Keep in refrigerator. Before serving, add 3 shrimps in each bowl.
Served chilled.

Soupe froide de concombre à la menthe
Pour 4 entrées

1 concombre
1 yaourt brassé
10 feuilles de menthe, lavées
1 large pincée de sel
12 crevettes cuites

Réduisez le concombre, la menthe, le sel et le yaourt en purée dans votre blender / mixeur (je commencer toujours par hacher 1/3 du concombre avant d'ajouter le reste, sinon tout se coince entre les lames du robot). Gardez au réfrigerateur.
Avant de servir, ajoutez 3 crevettes dans chaque bol.
Servez bien froid.

La suite, please

One year! and a Raspberry tart to celebrate

By Mélanie, on Saturday, July 25, 2009

tastespotting


One year ago, I started this blog. Like for a baby, this first year was mainly about learning. I needed understand about how to write, about the importance of plating and composing, about CSS (still not great!!), etc...

Even though I have still so much room to improve, I feel there has been some progress. I have enrolled in photoshop classes. I've discovered RSS feeds. I now know how to change the blog layout. I pay much more attention to the light in my photography. I've become familiar with new cooking techniques. I've even sewed a tablecloth (and learned how not to show the twisted hem in picture ;-)

web5

I am happy I had the occasion to learn all of this. And I'm very excited about the future steps! One of them is the blog remodeling, and I wished I had finished it today. I did try, but, boy, am I slow when it comes to "!-- #.a hover@ dd: exp }". Do this looks like swears words to you too?

However, I have one big news. I'm glad to announce that this blog is going to have a baby sister. It's due for this summer. I'm still thinking about names... There's going to be much less talking. No food. But a lot more to see. Can't wait!

web2

For this occasion, I want to share with you a special treat, the quintessence of this blog. It represents everything I love in a dessert. It's not too sweet, got plenty of fruits in it, their flavors brightened up by the almonds. This simple tart captures the summer mood.

The gorgeous raspberries are so fresh that it feels like sunshine in your mouth. Their acidity is partialy offset by the rich almond cream, which is layered over a sablée crust. Now do you really wonder why this has always been one of my favorite dessert? I thought I was the only one, but the number of "second"-servings proves me wrong! Although you can find it in almost any bakery in France, I had never prepared one myself. What a better time than a first year anniversary for this?

web4


Almond and Raspberry Tart

1 sablée tart shell
2/3 stick butter
1/2 cup almond flour
1/2 cup sugar
2 eggs
12 oz. raspberries
6 oz. mixed berries (whatever you have)
5 teaspoons sugar
1/2 sheet (1/2 teaspoon) gelatin

For the sablée tart shell, you can use one of these recipe :
- From J. Robuchon, my favorite, the one that has been used in my family for years. It's a little bit more difficult, sticky and has to be rolled thinly (because there is not so much dough). However, once you'll taste it, you'll forget the difficulties.
- From S. Glacier, easier, and tasty enough to compete with the one from Joel Robuchon. But be careful, there's a lot of dough, so it will be enough for a tart + 1 or 2 tartlets.
- The sugar pie crust from P. Hermé. Yields 3 tart shells, so you can freeze 2 and have it ready for another time.

Preheat oven to 350°F with rack in middle.
Roll out dough on a lightly floured surface with a floured rolling pin into a 12-inch round.
Slide bottom of tart pan (separate from rim) under dough and set into rim of tart pan. Cut off excess dough, leaving 1/2-inch overhang, and fold overhang inward. Press dough against side of pan, pushing dough 1/4 inch above rim. Lightly prick bottom of shell all over with a fork and chill until firm, 10 to 15 minutes.
Bake until side is set and edge is pale golden, about 12 minutes.

During that time, prepare the almond cream. Mix together sugar, almond flour and butter. Beat in the eggs.
Pour into the par-baked shell and bake 20 more minutes.
Let cool.

Arrange raspberries over the cooled pie.


In a small bowl, sprinkle the gelatin over the water, and let it sit.
Put remaining berries and sugar in a small saucepan over medium heat until cooked (about 5 minutes). Puree with a fork or in your blender. Pass through a sieve to keep only the juice and mix with gelatin while it's still warm.
Pour over the raspberry tart.

You can decorate with confectioner sugar and mixed berries.


Tarte amandine aux framboises

1 fond de tarte en pâte sablée
70g de beurre à température ambiante
110g de poudre d'amande
90g de sucre
2 oeufs
350g de framboises
170g de fruits rouges (framboises et/ou cassis, groseilles...)
20g de sucre
1/2 feuille de gélatine

Pour la pâte sablée, vous pouvez utiliser une des trois recettes suivantes
- Celle de J. Robuchon, ma préférée, mais la plus difficile à travailler. Elle est fragile et la quantité correspond à un fond de tarte de 24cm, il faut donc l'étaler finement (donc plus de risques de la casser). Ces difficultés sont vite oubliées dès qu'on la goûte.
- Celle de S. Glacier, que j'utilise aussi depuis un an. Elle est tout de même assez bonne pour faire de la concurrence à celle de Joel Robuchon! La quantité n'est pas très pratique, elle correspond à 1 tarte + 1 ou 2 tartelettes...
- Celle de P. Hermé. Il s'agit en fait d'une pâte sucrée. L'avantage est qu'elle correspond à 3 fonds de tarte, vous pouvez donc en congeler 2 et les avoir prêts pour un autre jour.

Préchauffez le four à 180°.

Etalez le disque de pâte en un cercle légèrement plus grand que votre moule à tarte, sur une épaisseur de 2-3 mm. Garnissez votre moule (beurré et fariné) avec la pâte et faites la pré-cuire 12 minutes au four.

Pendant ce temps, préparez la crème amandine :
Dans le bol de votre robot, mélangez le sucre et la poudre d'amande, puis le beurre en morceaux. Incorporez ensuite les oeufs.
Versez l'appareil sur le fond de tarte pré-cuit et enfournez pour 20 minutes.
Laissez refroidir à température ambiante.

Disposez les 350g de framboises sur la tarte.

Faites tremper la demi-feuille de gélatine dans de l'eau froide.
Dans une petite casserole, faites chauffer à feu moyen les fruits rouges avec le sucre pendant environ 5 minutes. Ecrasez-les avec une fourchette ou dans un hachoir, et passez-les à travers un chinois pour ne garder que le jus.
Mélangez le jus avec la gélatine essorée, et versez ce coulis sur les framboises.

Décorez avec du sucre glace et des fruits rouges.
La suite, please

Blog Under Construction

By Mélanie, on Sunday, July 19, 2009

I suddently felt the need for more light and space in my layout, and started to make modifications. Until I'm finished, the blog may look a little weird, sorry.
It is going to take some time, because :
- I suck at codes,
- I'm very obstinate, and I won't give up until I succeed (or spent 10h searching without finding a clue, for a little detail nobody will notice.)
So I first have to learn a lot, and I love that!

Hopefully I'll be back soon with a new and good looking design. If you have any suggestion for a more user-friendly site, don't hesitate to post a comment. La suite, please

Fireworks

By Mélanie, on Tuesday, July 14, 2009

No recipe today. Just wanted to share our garden fireworks on "Bastille Day" while waiting for the real one on the Eiffel Tower tonight.
Happy 14th of July!

feu d'artifice2
feu d'artifice1
feu d'artifice3
La suite, please

Pictures

By Mélanie, on Sunday, July 12, 2009

The first pictures from the wedding cake are here, if you want to check it out! La suite, please

The lovely Frozen Strawberry Pie

By Mélanie, on Monday, July 6, 2009

web1

I know I should be talking about the end of the wedding cake story.
But there's something more urgent first. I want to introduce you to this lovely dessert. It would be such a shame to wait there's definitively no more strawberries to share it with you. Because I really want you to try this pie.

Who knows, maybe it will become a favorite dish in your home too, one that you prepare for birthdays, mother days, or all June long... It will have its own memories attached to it.
Just like an antique dish or furniture, it has many stories to tell, the recipe being passed to friends and family and creating new souvenirs.

web3

I got this recipe from Marsha, my "american mother". When my brother was 16, he decided to spend one year in America. We were happy (and relieved!) to see that he was hosted by this incredibely generous and loving family. Actually, I was lucky too, because it also changed my life. Without him (and them), I don't think I would have cared to do an internship abroad. I learned english to communicate with them. And ten years later, we're still in touch...

Can you imagine that this cake was the first thing I ate in the US? Well, actually, I think the first thing was a half bagel. Then a wonderful chicken salad with strawberries. And then, this! (now I wonder... did Marsha did some research? I was a picky eater then. But strawberries? Always have been my favorites!).

web5

It was nine years ago. We were going to meet the family and to pick up my brother before exploring the West. Is that why I remember everything so precisely? My first impressions in the plane (actually, I was struck by the wide roads. It seemed like cars could park on each side of the road, and that 2 other ones could still cross each other. Even in the residential areas! My parents live in a ruelle. It's wide enough for 1 car. No parking. No crossing. And no huge car!). The first evening. And this pie is like a vessel carrying back all these memories to me.

Now, the vessel has grown larger, because my mother and I love it so much that we have it pretty often. One year we made it almost every Sundays of the summer...
Now that I think of it, it's also the one I made for my friends on the week-end they stayed over, just before our final graduation exams. The cake was great, but the week-end did not turn out exactly as I planned... Umm, here's one advise : don't ever run for the phone when you just got out of the swimming pool! Unless you want to go to the exams with a plaster cast and crutches... And as we were waiting for the ambulance, my friends tried to make me laugh and speak. You know what the best way is : talk about baking! So I actually had to repete this frozen pie recipe almost 10 times in a row. yeap.....

web2

So go make your own memories (maybe not this one!). You need more convincing? Ok.
- It's super easy to prepare (no requirement for an ice maker), and super quick, so you'll have more time to enjoy the sun outside this afternoon
- Well, it is lovely, isn't it? The pinky cream, the crisp crumble... What's not to love?
- We're in July. It's warm. You need something light and refreshing. Like a frozen dessert, don't you think?
- A frozen strawberry sherbet with some walnut crumble? Gah. What are you waiting for?

web4


Frozen Strawberry Pie
From Marsha, who says " This recipe comes from Aunt Helen, my father's only sister (who had to grow up with 5 brothers on the farm) - she had no kids and was always our 'favorite' aunt because she was so nice and spoiled us!!! She was also a very good cook!"

For the dough

1 cup flour
1/4 cup brown sugar
1/2 cup chopped walnuts
1/2 cup butter at room temperature

For the sherbet
2 fresh egg whites
1 pound strawberries
1 cup whipped cream
3/4 cup sugar
2 Tbsp lemon juice

Preheat oven to 350°F.
Butter a 10-inch round cake pan. Line the bottom and sides with parchment or waxed paper.

Place the walnuts in the oven for 5 minutes before chopping them.
In a large bowl, mix together the flour, brown sugar, butter and chopped walnuts with a spoon.
Sprinkle 1/4 cup of this dough on a baking sheet lined with parchment paper.
Gather and press the rest of the dough into a ball, and press on the bottom of the prepared pan.
Bake for 15 to 20 minutes (the crumble will be done before the crust). For the crumble topping, break the big crumbs while they are still warm.

Reserve 2 oz. strawberries for the decoration.
Dice the rest, the puree half of the strawberries.
Beat whites in mixer at medium speed until they form soft peaks*. Add sugar gradually, beating, and continue beating at high speed just until whites are thickened and form stiff peaks.
Add strawberries (dices and puree), lemon juice and whipped cream, and whip until fully incorporated.

Pour on the bottom crust in the round pan and place in the freezer for at least 6 hours. Before serving, apply a spong with hot water against the form and use the waxed paper to remove the pie from the pan. Sprinkle with the crumble and decorate with the remaining strawberries.

* Note : If you are concerned about using raw eggs, you could replace the sugar by a syrup : bring 1 cup sugar and 1 Tbsp water to a boil until it reaches 245°F. Then pour it on the fluffy egg whites while beating slowly. Continue beating at high speed just until whites are thickened and form stiff peaks, then proceed with the strawberries, etc...


Gateau Glacé aux fraises
De Marsha

Pour la pâte
140g de farine
100g de beurre
40g de sucre brun
70g de pralin ou de noix

Pour la crème aux fraises
2 blancs d'oeufs ultra frais
150g de sucre
450g de fraises
25cl de crème liquide
2 cuillères à soupe de jus de citron

Préchauffez le four à 180°.
Beurrez un moule rond de 26 cm de diamètre et tapissez le de papier sulfurisé.

Faites chauffer les noix 5 mn au four avant de les concasser, ou utilisez directement du pralin. Mélangez-le avec une cuillère avec le beurre, le sucre brun et la farine.
Reservez environ une poignée de pâte que vous saupoudrez sur une plaque à patisserie.
Formez une balle avec le reste, et étalez-la au fond du moule rond.
Faites cuire 15 à 20 minutes (attention, le crumble sera prêt avant le fond du gâteau). Si les morceaux de crumble sont trop gros, brisez-les lorsqu'ils sont encore chaud. Laissez refroidir (sans démouler).

Réservez 50g de fraises pour la décoration.
Coupez les 400g restantes en morceaux et réduisez la moitié en purée.
Battez les blancs en neige*, puis versez doucement le sucre en continuant à battre doucement. Augmentez la vitesse jusqu'à ce que les blancs soient fermes et brillants.
Dans un autre saladier, battez la crème liquide en chantilly. Ajoutez-la aux blancs, ainsi que les fraises et le jus de citron.

Versez l'appareil sur le fond dans le moule, et faites prendre au congélateur (au moins 6 heures).
Avant de servir, appliquez une éponge d'eau brulante sur les parois du moule, puis aidez-vous du papier sulfurisé pour le démouler et le placer sur une assiette. Parsemez le dessus de crumble et décorez avec les fraises.

* Si vous n'êtes pas à l'aise avec l'utilisation ddes oeufs non cuits, vous pouvez remplacer le sucre par un sirop : lorsque les blancs sont montés, portez 200g de sucre et 1 cuillère d'eau à ébullition jusqu'à atteindre 120°. Versez le sirop doucement sur les blancs tout en continuant à battre, puis augmentez la vitesse jusqu'à ce que les blancs soient fermes et brillants. Ajoutez ensuite les fraises, etc...

La suite, please

The first wedding cake : recap, links and advises

By Mélanie, on Friday, July 3, 2009

wedding1

A few weeks ago, I teased you about this big project I was working on.
I haven’t told you anything yet, because I just don’t know where to start. Do you remember my new year’s wishes? To the one moving in a new place, becoming a parent, or getting married? Well, I had people in mind for each situation, most of them happening in May / June. And because we were having a surprise party for one of the girl getting married, I decided to bake a “mini” wedding cake for her.

web7

In France, we usually don’t have wedding cakes as in the US. The typical “pièce montée” is a croquembouche. A pile of fluffy choux filled with pastry cream and covered with caramel, on a nougatine base. The whole cake / frosting thing was somehow unfamiliar to the pie lover I am. So, why did I come up with this idea?
I had actually never thought I’d do something like that. When I first read that Deb was baking one, I thought it was crazy. Not that she was crazy, no, she's like incredibly brave, but the whole concept? Oooh, stop right there! Baking a such a huge thing in a tiny kitchen? For a bride? All this responsability? Never gonna happen!
Helen was the next one. She’s a professional pastry chef, and her desserts always look amazing. Her pictures let me speechless, but I don’t imagine achieving as beautiful creations as she does…
They were both really committed to do a perfect cake for their friend; their posts gave my first glimpse of what an American wedding cake was. I discovered that they were actually different cakes, with different flavors or fillings, stacked one on top of the other. The cakes are most often butter cakes (1-2-3-4 cake, white butter cake, chocolate cake...) with a filling (lemon curd, chocolate ganache…) and the frosting. Although I had this first approach, I was far from conceiving baking one myself.

Eggs

Two weeks before the surprise party (D-12), it all changed.I found some very clear tutorials on Epicurious site. If you’re planning to make a wedding cake, or even if you only want to understand what’s “under” the imposing white assembly that has pride of place on the wedding buffet, go check out these videos. It opened a new world to me. I was now bursting with curiosity. Will I be able to do that for her? Will I remember how to frost a cake with a smooth layer? If I do some effort, will the decoration be ok (instead of really bad)? Will she like having a cake like this, and what type of cake does she like best?

Huge quantities

Because I’m really bad with subtle investigation, I had to rely on what I already knew : she loves peanut butter & chocolate, and enjoys the berry pies I sometimes bring. Therefore it was soon (D-6) decided that the cake would be:

- First tier a chocolate cake (in FR) with a chocolate kahlua ganache (in FR)

- Second tier a raspberry cake (in FR) with a lemon curd filling (in FR)

- Third tier a chocolate cake with a peanut butter frosting (in FR)

The next two days were dedicated to researches about the frosting and decoration, but I'll tell you more about it next time..

Lemon & raspberry cake

For now, let's talk about the cakes and the filling, which I made on Monday afternoon (D-3). Luckily for me, it was a holiday, which gave me more time to prepare and to take notes...
Both cakes recipes come from the Smittenkitchen repertoire, and originally from Sky High: Irresistible Triple-Layer Cakes. I followed the chocolate cake recipe à la lettre (by the letter - which means without changing anything), and I've liked it so much that I've already made it twice since. The steps are very easy to follow (just make sure the bowl of the mixer is big enough ; there is a LOT of batter), the cake is moist and very light. You add a cup of coffee in the batter, but you won't really taste it. However, it picks up and extends the toasty notes of the best quality cocoa. You could use it for cupcakes, birthday cakes... or without any reason, just because it is sooo good.
For the white cake, I did tweak the recipe a little in order to reduce the quantities and to flavor the batter with raspberries, but in the end both recipe are similar and very simple (which is what you're looking for when you also have fillings and frosting on your to do list!). The cake was too sweet for my taste, and I tried to offset that by reducing the sugar in the lemon curd. It must have been successful, because this was everyone's favorite. If you're only doing the cake or the curd, keep that in mind and adjust the sugar level...

Recap

The chocolate ganache will take only a few minutes to prepare (if you're not goofy like me, who read the wrong page and used milk instead of cream!*). It can surely satisfy any chocolate lover, with its intense flavor and bittersweet notes, and the complexity added by the Kalhua. You could easily replace that with Brandy, Amaretto, or any liquor you like.
As for the lemon curd, it's THE recipe I swear by. It's by Pierre Hermé (could you have guessed that?), and everyone just raves about it. You can use it on a simple sablée dough, with strawberries, on a gingerbread biscuit, on poached blueberries. The tangy, citrusy aromas are sweetly counterbalanced by the buttery taste and by its lightness in the mouth. The secret of its fluffy texture lies in the last step of the process : after adding the butter, do not underestimate the importance of the whipping time...

Cakes & filling


*Btw, if this happens to you, just start over again. You will never obtain the right consistency for a cake, no matter how long it stays in the fridge... You can use it as a chocolate sauce though!

Ok, so after all this talk, maybe you'd like the recipes, right?

Chocolate Cake layers
From Smittenkitchen.com

3 cups cake flour
3 cups sugar
1 1/2 cups unsweetened cocoa powder (not Dutch process)
3 teaspoons baking soda
3/4 teaspoon ground cinnamon
3/4 teaspoon salt
3 sticks (12 ounces) unsalted butter, at room temperature
1 1/2 cups buttermilk
3 eggs
1 1/2 cups freshly brewed coffee, cooled to room temperature

Preheat the oven to 325 degrees F.
Butter two 10-inch and two 3.5-inch round cake pans, and dust with flour.

In a large mixer bowl, combine the flour, sugar, cocoa, baking soda, cinnamon, and salt. With the electric mixer on low speed, blend for about 30 seconds.
Add the butter and buttermilk and blend on low until moistened. Raise the speed to medium and beat until light and fluffy, 2 to 3 minutes.
Whisk the eggs and coffee together, and add to the batter in 3 additions, scraping down the sides of the bowl and beating only until blended after each addition. Divide the batter among the prepared pans.

Bake the large cakes for about 40 minutes, the smaller ones for about 20 minutes, or until a knife inserted in the center comes out clean. Let the cake cool in its pan on a rack for 20 minutes; then carefully turn the cake out of the pan and revert it. Allow to cool completely. The cake will deflate slightly as it cools.


Raspberry cake layers
Adapted from Smittenkitchen.com

1 3/4 cups cake flour
1 1/4 cups sugar
1 tablespoon teaspoons baking powder
1/4 teaspoon salt
1 1/4 sticks unsalted butter, at room temperature
2/3 cup plus 2 Tbsp buttermilk
3 eggs
1 teaspoon vanilla extract
1/2 cup pureed raspberries

Preheat oven to 325°F.
Butter two 7-inch round cake pans and dust with flour.

Combine the cake flour, sugar, baking powder, and salt in a large mixer bowl. With the mixer on low speed, blend for 30 seconds. Add the butter and the buttermilk. Mix on low speed briefly to blend; then raise the speed to medium and beat until light and fluffy, 2 to 3 minutes.
Add the eggs one at a time to the cake batter, whisking after each addition. Add vanilla extract and raspberry puree, and whisk well. Use a rubber spatula to scrape down the sides of the bowl if needed.

Bake for about 30 minutes, or until a knife inserted in the center comes out clean. Let the cake cool in its pan on a rack for 20 minutes; then carefully turn the cake out of the pan and revert it. Allow to cool completely on a rack.


Chocolate Kalhua Ganache
Adapted from Pierre Hermé

Soon

Lemon Curd
From Pierre Hermé

3 eggs
3/4 cup sugar
Zest from 3 lemons
1/2 cup lemon juice (from about 4 lemons)
1 3/4 sticks butter

In a big bowl, combine with your fingers the sugar with the lemon zest, until the sugar is fragrant. Add the eggs and the lemon juice, and whisk until homogeneous.
Place the bowl over a bain marie (a pan of boiling water). Continue to whisk until the mixture thickens and has the consistency of a cream (about 10 minutes). Be careful that it doesn’t boil.
As soon as the cream is ready, change it to a cold bowl, to stop the cooking. Wait for the cream to slightly cool down before adding the butter cut in small pieces.
Whisk with the mixer during 10 minutes to obtain a light consistency.
Keep in refrigerator for up to 3 days.


Peanut Butter Frosting

1.5 ounces cream cheese, at room temperature
1/8 stick unsalted butter, at room temperature
3/8 cups confectioners’ sugar, sifted
3 Tbsp smooth peanut butter, preferably a commercial brand (because oil doesn’t separate out)

In a bowl with an electric mixer, beat the cream cheese and butter until light and fluffy. Gradually add the confectioners’ sugar. Continue to beat on medium speed until light and fluffy, 3 to 4 minutes.
Add the peanut butter and beat until thoroughly blended.
Keep in refrigerator for up to 3 days.


Biscuit au cacao
Du site Smittenkitchen.com et du livre Sky High: Irresistible Triple-Layer Cakes

420g de farine
600g de sucre
125g de cacao
1 cuillère à soupe (15g) de levure
1 cuillère à café (2g) de cannelle
1 cuillère à café (2g) de sel
300g de beurre ramolli
37,5 cl de lait fermenté**
3 œufs
37,5cl de café à température ambiante

** Si vous n'avez pas de lait fermenté, pour 25cl de lait il faut ajouter 1 cuillère de jus de citron et laisser reposer 10 minutes.

Préchauffez le four à 175°.
Beurrez et farinez 2 moules ronds de 26 cm de diamètre et 2 moules de 9 cm de diamètres.

Dans le bol de votre mixeur, combinez la farine, le sucre, le cacao, la levure, la cannelle et le sel. Mélangez doucement 30 secondes. Ajoutez le beurre en morceaux et le lait fermenté et mélangez pour les incorporer à la farine, environ 2 à 3 minutes.

Dans un saladier, mélangez les œufs et le café, et ajoutez-les au mélange précédent en trois fois, en mélangeant bien à chaque fois. Utilisez une spatule pour racler les bords et le fond du bol et bien tout incorporer.

Versez l'appareil dans les moules et faites cuire environ 40 minutes pour les gros gateaux, 20 minutes pour les petits (en plantant la pointe d’un couteau au centre du gâteau, celle-ci doit ressortir sèche).
Attendez 20 minutes avant de démouler et laisser refroidir totalement les biscuits sur une grille.


Biscuit aux framboises
Adapté à partir du site Smittenkitchen.com et du livre Sky High: Irresistible Triple-Layer Cakes

Note : Ce biscuit est très sucré, ce qui était compensé par l'acidité de la crème au citron. En revanche, si vous pensez le garnir avec une autre crème, n'hésitez pas à réduire la quantité de sucre (je dirais 200g).

260g de farine
250g de sucre
1 sachet de levure
1 pincée de sel
125g de beurre ramolli
20cl de lait fermenté (cf note dans le biscuit au chocolat)
3 œufs
1 cuillère à café d'extrait de vanille
50g de framboises réduites en purée au hachoir

Préchauffez le four à 175°.
Beurrez et farinez 2 moules ronds de 18 cm de diamètre.

Dans le bol de votre mixeur, combinez la farine, le sucre, la levure et le sel. Mélangez doucement 30 secondes. Ajoutez le beurre en morceaux et le lait fermenté et mélangez pour les incorporer à la farine, environ 2 à 3 minutes.
Ajoutez ensuite les œufs un à un, en mélangeant bien après chaque addition. Utilisez une spatule pour racler les bords et le fond du bol et bien tout incorporer. Finissez avec la purée de framboises et la vanille.

Versez l'appareil dans les deux moules et faites cuire environ 30 minutes (en plantant la pointe d’un couteau au centre du gâteau, celle-ci doit ressortir sèche).
Attendez 20 minutes avant de démouler et laisser refroidir totalement les deux biscuits sur une grille.


Ganache Chocolat Kalhua

Bientôt...


Crème au citron
Adapté de Mes Desserts préférés, Pierre Hermé

3 œufs
150g de sucre
les zestes de 3 citrons
120g de jus de citron (environ 4 citrons)
175g de beurre

Dans un grand bol, frottez avec vos doigts le sucre avec les zestes de citron, jusqu'à ce qu'il soit humide. Battez ensemble les œufs, le jus de citron, le sucre et les zestes.
Posez ce bol dans un bain marie (une casserole d'eau bouillante). Continuez de remuer jusqu'à ce que le mélange épaississe et prenne la consistance d'une crème (environ 10 minutes). Attention, elle ne doit pas bouillir.
Dès que la crème est assez épaisse, versez-la dans un bol froid, pour stopper la cuisson. Attendez que cette crème refroidisse un peu (si vous avez un thermomètre, elle doit atteindre 60°) avant d'ajoutez le beurre coupé en petits morceaux.
Fouettez avec le batteur électrique pendant 10 minutes pour obtenir une consistance homogène. Ne sous-estimez pas cette étape, c'est elle qui donnera la légèreté à la crème.
Vous pouvez conserver cette crème au réfrigérateur jusqu'à 3 jours.

Crème au beurre de cacahouète

45g de fromage à tartiner (type St Moret)
15g de beurre ramolli
50g de sucre glace
3 cuillères à soupe de beurre de cacahouète

Dans un saladier, à l'aide d'un batteur électrique, fouettez le fromage frais et le beurre jusqu'à ce que le mélange soit crémeux. Ajoutez doucement le sucre glace, en remuant d'abord avec une cuillère (pour ne pas mettre du sucre dans toute la cuisine). Ajoutez finalement le beurre de cacahouète, et battez cette crème au moins 3 minutes.
Vous pouvez conserver cette crème au réfrigérateur jusqu'à 3 jours.
La suite, please

A strawberry watermelon smoothie for a sunday afternoon

By Mélanie, on Saturday, June 13, 2009

smoothie site 2

Tomorrow it's gonna be Sunday. It's going to be a sunny and warm day. Imagine yourself enjoying the nice weather outside. Maybe even having a barbecue, gardening, or just relaxing. You know what would make this day even more perfect? The vibrant taste of strawberries, yes. But, most of all, in the form of a cold and refreshing drink!
So please, go put one yogurt in the freezer now. That's it. Tomorrow, all you'll have to do is to add a handful of strawberries, a piece of watermelon, and some mint leaves to brighten up the flavours. And enjoy!

smoothie site1


Strawberry Watermelon Smoothie

1 yogurt (fat free)
A dozain strawberries
2 oz. watermelon (without the skin)
4 mint leaves

The day before, put the yogurt in the freezer.

Cut the fruits in large cubes, put in the blender with the frozen yogurt and mint. Blend. Serve. Enjoy!

Smoothie aux fraises et à la pastèque

1 yaourt nature (0% par exemple)
Une douzaine de fraises
1 morceau de pastèque (environ 60g sans la peau)
4 feuilles de menthe

La veille, mettez le yaourt au congélateur.

Coupez les fruits en large morceaux, placez les avec le yaourt (brisé en morceaux) et la menthe dans le mixeur. Mexez. Servez. Et appreciez! :)
La suite, please

Bring summer home with a tomato tart

By Mélanie, on Wednesday, June 3, 2009

Sun dried tomatoes

This was a surprise.

Most of the times, I know before starting what's going to be shared with you. The choice is already made, and the experience is very different. I'm thinking of you in the kitchen, and I am paying special attention to the preparation : I take detailed notes and pictures of the different steps, I measure everything, and I try not to be messy.
And believe me, clumsy as I am, this is the hardest part! When I bake, I usually end up with flour and eggs all over the place. Maybe it sounds more real, but it doesn't look good on the pictures! ;-)

Some parmeggiano

After that comes the plating and the testing. This is when I might be torn :
See, sometimes it looks good.
The pictures are nice.
I'd really love to show you the result (especially if I took 25 pictures of it).
Like this one. Pretty thing, isn't it?

don't juge on looks!

But!
The taste doesn't match with the work needed / the look achieved. And I won't tell you how to spend 3 hours in your kitchen for a bla result, won't I?
Yeah, I'm that nice!

Because I'm that nice, I'm also going to tell you about this savory tart I made the other day. It's very simple, and was made in a hurry, before leaving for a party. I was late, and it even finished cooking during the evening, in the turned off oven. I did not care, it was just a way to use my soon-to-be out-of-date mozzarella. But last night, I had a bite of it, and O.M.G.! No way I'm keeping that for myself! Even if I don't have any picture to go along with it...

PS : Next time, I'm going to tell you about what kept me busy since saturday. Non stop (in my head anyway). Let just say it involves some research. A little handycrafts. Lots of butter and sugar. And a super excited me!! I'm doing the last (and most difficult) steps tonight. We'll see if I'm still this happy tomorrow... But the best thing is all the nice bloggers who helped me with the little aléas in my way to buttercream heaven!

before the oven

That's how far it gets with the pictures....

Zucchini, Sun-Dried Tomato, and Mozzarella Tart
Adapted from
Bon Appetit

For the tomatoes (you can substitute them with oil-packed sun-dried tomatoes)
6 small tomatoes or 4 large ones
5 Tbsp olive oil
1 rosemary branch (about 1 Tbsp dried one)
1 thyme branch (about 1-2 Tbsp dried one)
1/2 tsp salt

1 sheet puff pastry (made with butter, please!!)
1 1/2 cups shredded mozzarella cheese
6 Tbsp freshly grated Parmesan cheese
1 tablespoon chopped fresh oregano
1 small zucchini, cut into thin rounds
2 large eggs
1 cup half and half
1/4 teaspoon salt
1/4 teaspoon ground black pepper

Prepare the tomatoes :
Preheat oven to 300°F.
Quarter the tomatoes (or cut in 6 for the large ones). Remove the seeds, you just want to keep a tomato "petal". Put them all in the same way, skin side down, on your baking pan, and drizzle with olive oil. Sprinkle with rosemary, thyme and salt. You could also add a garlic clove.
Roast for 1 to 1 1/2 hours, turning the tomatoes from one side to another every 15-20 minutes.

Raise oven temperature to 400°F.
Transfer pastry to 11-inch tart pan with removable bottom. Fold in overhang to form double-thick sides. Pierce with fork, fill with beans or pie weights. Bake pastry until sides are set, about 20 minutes.

Sprinkle mozzarella over bottom of crust. Top with tomatoes, zucchini rounds in concentric circles to cover top of tart. Whisk eggs, half and half, salt, and pepper in medium bowl. Pour mixture into tart. Sprinkle with Parmesan.

Bake tart until custard is set and crust is golden brown, about 40 minutes. Serve warm or at room temperature.


Quiche aux Tomates confites, Courgettes et Mozzarella
Adapté de
Bon Appetit

Pour les tomates (si vous n'avez pas le temps, achetez des tomates confites à l'huile d'olive) :
6 petites tomates ou 4 grosses
5 bonnes cuillères à soupe d'huile d'olive
1 branche de romarin (environ 1 cuillère de romarin séché)
1 branche de thym (1 à 2 cuillères de thym séché)
1/2 cuillère à café de sel

1 rouleau de pâte feuilletée pré-étalée pur beurre*
1 boule de mozzarella, coupée en petits morceaux
6 bonnes cuillères à soupe de parmesan râpé
1 cuillères à soupe d'origan
1 petite courgettes, coupée en fines rondelles
2 oeufs
12,5 cl de lait
12,5 cl de crème
Sel et poivre

* Après avoir essayé plusieurs marques, la pâte feuilletée de chez Picard arrive loin en tête devant les autres...

Préparez les tomates :
Préchauffez le four à 150°.
Coupez les tomates en 4 quartiers (ou en 6 pour les grosses). Enlevez les pépins et le centre, en ne gardant que la chair extérieure, pour former une sorte de "pétale". Placez les sur la plaque de cuisson, coté coupé vers le haut, et arrosez d'huile d'olive. Ajoutez le thym, le romarin et le sel. Vous pouvez également ajouter une gousse d'ail.
Faites confire les tomates 1h à 1h30, en retournant les pétales toutes les 15-20 minutes.

Augmentez la température du four à 200°.
Foncez le moule avec le disque de pâte feuilletée, piquez le fond avec une fourchette. Faites cuire 20 minutes.

Parsemez le fond de pâte avec la mozzarella, puis disposez les tomates confites et les disques de courgette de manière concentrique.
Mélangez les oeufs, le lait, la crème, l'origan, le sel et le poivre dans un petit bol. Versez cette préparation sur la quiche, et saupoudrez de Parmesan.

Faites cuire 40 minutes, jusqu'à ce que la tarte ait une jolie couleur dorée et soit légèrement gonflée. Servez chaud ou à température ambiante.
La suite, please

Lucky

By Mélanie, on Sunday, May 24, 2009

IMG_0032

It’s funny how I tend to digress. I started to write a post about the freshly harvested green onions I bought at the farmers market last week. From that, I went to the fact that I don’t go enough to the market in Paris. Then to a panegyric of the quiet life in Montmorency, where I spend the week-end. I almost finished with childhood memories of our summers in the garden! So glad I stopped there!

Yes, the principal idea was to tell you how I love the farmers market. I really feel lucky to be able to enjoy a life in Paris, with so many things to see, streets to walk in, little shops to be surprised with, building fronts to suddenly notice…

IMG_0077

And yet, I have access to the freshest produces from surrounding areas. I love to wander in the aisles, admiring the colorful displays, bright red tomatoes against green asparagus and purple artichokes. I see curious children, asking lots of questions to their parents, wanting to know more, to taste the cheeses, the saucisson. Or the olives, why not? Apparently I ate them by the dozen as a kid, in my stroller!
I see people passionate about their job (because it’s so difficult, I can’t imagine anyone not passionate doing this…).

3519999732_b54ab83bd5

All of this makes me feel as lucky and happy as the sensation of a sunray on my skin. Actually, I even realize that my memories of the farmers market are imbued with sunshine, while I know I had my rainbow open all the time…

Le rosier et le ciel

With all this beautiful array of products, it was very difficult to resist. I had not planned the week’s menus, and I was tempted by everything. The green onions seemed so fresh, and with their sweet taste, they offer just what my palate needs!
I was totally smitten with Deb’s idea to caramelize them with balsamic vinegar. I mean, she does that with cippolne, but what could go wrong with green onions cooking in a syrupy glaze made of vinegar, sugar and tomatoes? They were tender to the tooth, and the vinegar adds a slight tang which makes them completely addictive. I already made them 3 times in less than a month.

IMG_0017Green onions with balsamic glaze

Add to that some juicy tomatoes, ripe to perfection, and crispy slices of pancetta or bacon, and I guaranty you’ll feel happy too!

IMG_0033


Balsamic caramelized onions salad
For 4

For the onions
1 bunch green onions
5 Tbsp balsamic vinegar
3 Tbsp water
1 Tbsp ketchup
1/2 tsp salt

1 small head of lettuce
8 slices pancetta or bacon
4 tomatoes
4 Tbsp olive oil
1/2 tsp salt
Rosemary

Prepare onions : trimm root ends and cut off the dark green tops. Peel and discard the first layer.
Sauté bacon in large skillet over medium-high heat until crisp. Using slotted spoon, transfer to paper towels to drain. Keep drippings in skillet and add onions; sauté until light golden brown on all sides, about 5 minutes.
Add vinegar, ketchup, salt and water and bring to a boil. Cook onions 10 more minutes. The sauce should be slightly sirupy. If liquid dissipates too quickly, add a little more water.
Remove from saute pan and allow to cool.

Cut the tomatoes in small dices. Transfer to a bowl with the lettuce and the onions. Sprinkle with bacon.
Whisk olive oil with the balsamic vinegar remaining and season with salt and pepper. Drizzle over salad and garnish with rosemary.


Salade aux petits oignons caramélisés
Pour 4 personnes

Pour les oignons
1 botte de petits oignons nouveaux
5 grandes cuillères à soupe de vinaigre balsamique (8 cl)
3 cuillères à soupe d'eau
1 cuillère à soupe de ketchup
1 pincée de sel

1 petite laitue, lavée
8 tranches de pancetta (ou de lard)
4 tomates
4 cuillères d'huile d'olive
1 pincée de sel
1 branche de romarin

Faites griller la pancetta à sec dans une poêle sur feu vif jusqu'à ce que les tranches se recroquevillent, environ 4 minutes de chaque coté, pour qu'elle soit croustillante.
Pendant ce temps, épluchez les oignons, en ne gardant que la partie blanche, et en retirant la 1ère couche de peau. Vous pouvez garder une partie de la tige verte pour servir avec une salade, des pâtes, etc...
Retirez les tranches de pancetta pour les égouttez dans du sopalin, mais laissez la graisse dans la poêle. Ajoutez-y les oignons et faites les dorer quelques minutes.
Ajoutez ensuite le vinaigre balsamique, l'eau, le ketchup et le sel et portez à ébullition. Laissez cuire environ 10 minutes, jusqu'à ce que la sauce soit un peu sirupeuse et adhère aux oignons. Si elle s'évapore trop rapidement, rajoutez un peu d'eau.
Retirez de la plaque de cuisson et laissez refroidir.

Coupez les tomates en dés.
Dans un grand saladier, mélangez les feuilles de salade, les tomates, les oignons, et parsemez de petits morceaux de pancetta.
Emulsionnez (mélanger très rapidement) le vinaigre balsamique qui avait servi à la cuisson avec l'huile et le sel et versez cette sauce sur la salade. Décorez avec le romarin et servez.
La suite, please