About Nutella, or how to be deified by chocolate addicts

By Mélanie, on Tuesday, December 9, 2008

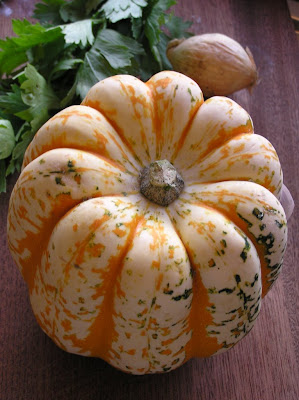
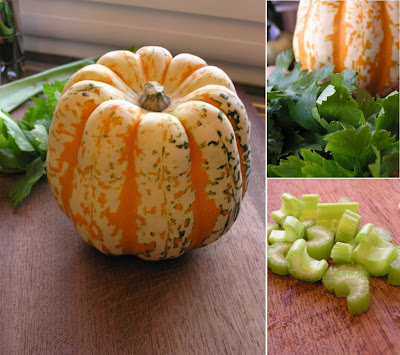
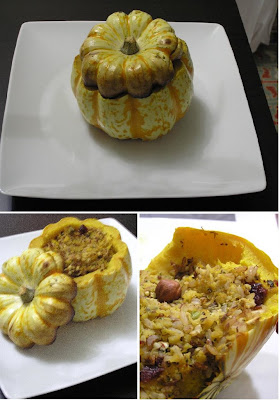
With all that time of silence, I could have come back with a long post. Apologizing for missing Thanksgiving and the preparation of Christmas cookies (and partly blaming work, health, and all those stuff that continue to keep me busy). Telling you about my wonderful week-end in London, trying to resist to the omnipresence of Christmas cookbooks. I still don’t know if the 3 books I carried in my backpack are a proof that I succeed or failed…. To my discharge, one of them was planned (and searched… in 5 libraries! So I will make sure to use Anita’s Field Guide to Cookies a lot as soon as the Christmas holidays start).

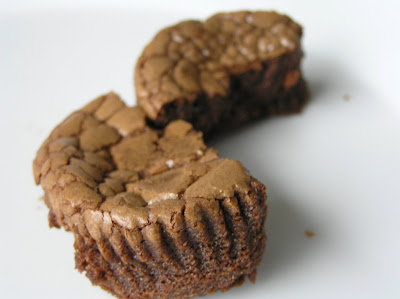
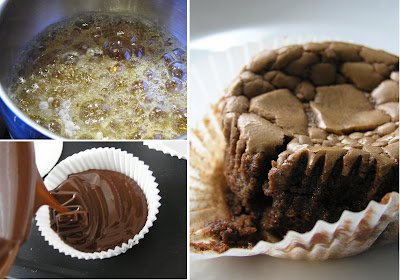
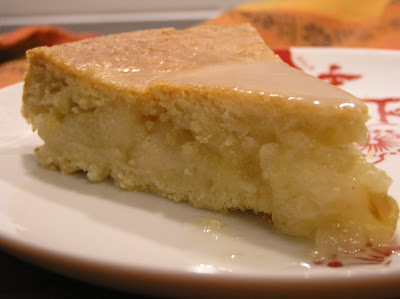
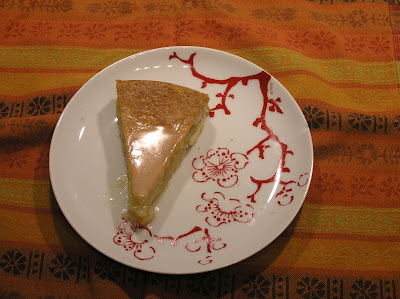
The thing is, since I’m no good at writing, it would have been even longer before I’d give you this new recipe. And, after seeing the tart disappear in less than 5 minutes, and being addressed by a group of 4 people with a “You made the nutella tart? It’s amazing! Can I have the recipe please?” I sort of understood this was urgent.

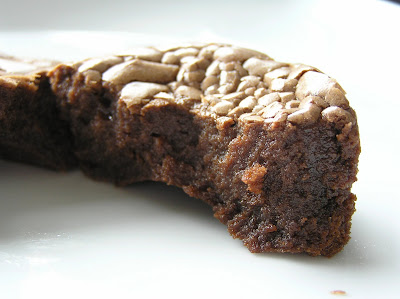
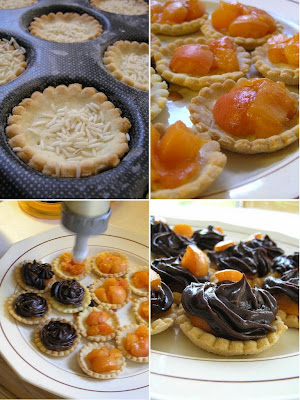
See, I made it for Juliette’s birthday, because I always get confused about the fruits she likes and doesn’t. But I have very clear memories of the many holidays we spent in Bretignolles. Breakfast with a gache vendéenne and nutella has always been part of it, so I was pretty sure she’d also enjoy the tart. It is creamy and crunchy thanks to the hazelnuts, but mostly rich and chocolaty, so that a simple bite brings you total satisfaction. Apparently, everyone thought so…


From Pierre Hermé

1 disk of sugar dough for the tart shell (here or there)
7 oz. nutella
5 oz. bittersweet chocolate
1 cup (2 sticks) butter
1 egg
3 yolks
2 Tbsp sugar
5 oz. Coarsely chopped hazelnuts

Preheat oven to 350°F.

Roll the disk of dough into an 12-inch circle, 1/4-inch thick, on a lightly floured surface. Line a 10-inch pie pan, leaving a 1-inch overhang.
Line shell with foil and fill with pie weights. Bake until edge is pale golden, about 12 minutes.
Spread nutella over bottom of the tart shell.
Stir chocolate and butter in heavy medium saucepan over low heat until melted and smooth. Remove from heat. Cool to lukewarm, stirring often. Stir the egg and yolks one into melted chocolate, one at a time. Whisk slowly, starting at the center and slowly working your way out in concentric circles until you have a smooth, shiny mixture. Finally incorporate sugar.
Pour filling into cooled crust, over the nutella. Sprinkle with chopped hazelnuts and bake until filling is set about 3 inches from edge but center is still wobbly, 11 minutes at 360°F. (Center will continue to set as tart cools.) Partly cool in pan on rack, about 30 minutes, before serving. This is also very good at room temperature.


Tarte au Nutella
De Pierre Hermé

1 fond de tarte sucrée (ici ou )
200g de nutella
140g de chocolat noir
200g de beurre
1 œuf
3 jaunes
2 cuillères à soupe de sucre
140g de noisettes grossièrement hachées

Préchauffez le four à 180°.

Farinez abondamment le plan de travail ainsi que le rouleau à pâtisserie, puis étalez la pâte sur 2 à 3 mm d'épaisseur.
Etalez le disque de pâte en un cercle légèrement plus grand que votre moule à tarte (la recette a été réalisée avec un moule de 27cm). Foncez votre moule (beurré et fariné) avec la pâte et faites la précuire 12 minutes au four.

Tartinez le fond de la tarte avec le nutella. Réservez au frais.

Faites fondre le chocolat avec le beurre. Laissez refroidir légèrement (jusqu’à environ 40°). Incorporez délicatement l’œuf au chocolat. Utilisez une maryse pour éviter d’incorporer de l’air dans la ganache. Incorporez ensuite les jaunes un à un, puis le sucre.

Versez la ganache sur le nutella dans le fond de la tarte, et parsemez de noisettes grillées.
Faites cuire la tarte 11 minutes à 190°, juste assez pour que les bords soient fermes et le centre encore tremblotant.
Laissez refroidir dans le moule, environ 30 minutes, et servez tiède ou à température ambiante.
La suite, please

Playing with cookies

By Mélanie, on Sunday, November 23, 2008

I know, I know, I shouldn't play with food. But I could not resist to those cute little bears. And not only are they cute, they're really good too. I wasn't crazy about candies as a child, but those, oh, how I loved them! The marshmallow is so soft and sweet, coated with milk chocolate. If you don't know anything about the Oursons Guimauve, David Lebovitz's site will help you.
So when I saw them in the grocery store, I immediately knew I'd like to use them for my next baker's experiment.
Unfortunately, I think this must have looked like a horror movie for the poor little bears...

They were first cut in pieces, in order to be incorporated to a simple cookie dough. Then, they were refrigerated for a whole day (see, I also follow the rules I preach).
I was very curious to see how this would turn out after the cooking. First, they melted totally in the oven. But then the sugar of the marshmallow bubbled, and caramelized. Combined with the chocolate from the coating, it tasted like another delicious candy, the Michoko (I think it's like Heath bar? soft toffee coated in dark chocolate).

The thing is, they spread a lot. The caramel gets very flat, so the best is to reshape them into a disk when they're still warm. At this temperature, the caramel is malleable and forms strings, just like melting cheese. I was surprised, but, honestly, sticky and chewy cookies? I like that!! If you don't (why would you?), just wait a little. Once cold, you'll end up with a part cookie / part hard chocolate-caramel goody...


Marshmallows cookies

1 1/8 cups all-purpose flour
1/2 teaspoon baking soda
1/2 teaspoon salt
1 stick butter, room temperature
1/4 cup granulated sugar
1/2 cup packed brown sugar
1/2 vanilla pod
1 egg
1/2 cup semi-sweet chocolate morsels
4 oz “oursons en guimauve” (mini-marshmallows covered with milk chocolate)

Combine flour, baking soda and salt in small bowl. Beat butter, granulated sugar, brown sugar and vanilla extract in large mixer bowl until creamy. Add egg and flour mixture gradually. Stir in morsels and marshmallows. Press plastic wrap against dough and refrigerate for 24 to 36 hours.
Preheat oven to 350° F. Line the baking sheets with parchment paper. Scoop 2 1/2-ounce mounds of dough onto baking sheet. Bake until golden brown but still soft, 12 to 15 minutes. Transfer sheets to a wire rack for 10 minutes, then slip cookies onto another rack to cool a bit more. Repeat with remaining dough. Eat warm.


Cookies aux oursons en guimauve

150g de farine
1/2 cuillère à café de bicarbonate de soude
1/2 cuillère à café de sel
100g de beurre à temperature ambiante
50g de sucre
120g de sucre brun
1/2 gousse de vanille
1 oeuf
70g de pepites de chocolat noir
1 paquet de 120g d’oursons en guimauve

Mélangez la farine, la levure et le sel dans un saladier à part.
En utilisant la spatule de votre robot, travaillez le beurre ramolli avec les sucres jusqu'à ce que le mélange blanchisse. Ajoutez les graines de vanille, l’ œuf et le mélange à base de farine, en mélangeant bien après chaque addition. Incorporez ensuite les morceaux de chocolat et les oursons coupés en 4, en mélangeant avec une cuillère, pour ne pas les casser.
Couvrez la pâte d’un film plastique et réfrigérez 24 à 36 heures.
Préchauffez le four à 170°.
Tapissez les plaques à pâtisserie de papier sulfurisé. A l’aide d’une cuillère, faites des tas de pâte de la taille d’une petite balle de golf, et disposez les sur la plaque. Prenez soin de les espacer suffisamment pour ne pas qu’ils se collent entre eux lors de la cuisson. Enfournez pour environ 12 à 16 minutes. Laissez les refroidir quelques minutes avant de les transférer sur une grille.
Dégustez les encore chauds.
La suite, please

Autumnal melody : hazelnut, caramel and pears

By Mélanie, on Wednesday, November 19, 2008


Did I tell you that I like to bake with constraints ? Having a “brain-teaser” to solve before finding what I could serve? Well, this week-end, my wishes were granted. I had a lot of constraints…
I offered to bring a dessert for a party. So the whole “dessert on a plate/in a jar/etc…” thing was excluded. My thought immediately wandered to the different kinds of cookies I could make. I could try new selections, what fun I could have!! (you’ll see that soon).
But this would have been too easy! The only person I really knew at this party added some other specifications. No chocolate. Something light (which is a difficult concept to grasp, as he then told me how good a chocolate mousse was… Do you understand how lost I was?). So I made up my mind and decided that light had to mean without butter, and not too dense.


I’m still in this autumnal mood, so pears seemed very appropriate. And after reading Tartelette’s Poire d’Eve description, I was highly attracted to the idea of associating them with caramel. And this was no mistake…


For the base, I mixed white eggs with hazelnut, obtaining a very light dacquoise, between the macaron and the meringue. This is the easiest thing to do, and it is delicious. Plus, it’s very versatile, you can replace hazelnuts with almonds, or with coconut, and turn the whole cake into something new.
After that, I added the poached pears, covered with a soft caramel mousse. Don’t be afraid by the description of the recipe, which is long, I don’t think it took me more than 2 hours to make (dish washing included!). You just need to be organized, and, well… have a lots of containers and bowls…
I have to admit I was not feeling very well and I did not taste it, but everyone said it was very good, so we’re gonna need to trust them on that one!


Autumnal Melody

For the hazelnut angel cake :
3/4 cup confectioner sugar
1 cup (lightly packed) hazelnut powder
1/4 cup flour
4 egg whites
1/4 cup brown sugar

For the caramel :
1/3 cup sugar
1/3 cup heavy cream

For the caramel mousse :
1 egg and 2 yolks, room temperature*
½ cup sugar
3 tsp. powdered gelatin, sprinkled over 3 Tbsp water
1 cup heavy cream
3 poached pears, cubed - or - 3 canned pears in syrup

For the glaze (optional)
1/2 pear, thinly sliced
1/2 cup reserved poaching syrup
1 tsp gelatin, sprinkled over 1 Tbsp water

* The eggs need to be at room temperature, otherwise the sugar will crystallize when poured over the beaten eggs.

Prepare the cake :

Preheat oven to 350°F.

In a large bowl, sift together flour and confectioner sugar. Add the hazelnuts.
Beat whites in mixer at medium speed until they form soft peaks. Add brown sugar gradually, beating, and continue beating at high speed just until whites are thickened and form soft, droopy peaks.
Sprinkle one third of sifted dry ingredients over whites and fold in with a rubber spatula gently but thoroughly. Fold in remaining dry ingredients, one third at a time.

If you don’t have a ring mold or a springform, you could use parchment paper to remove the finished cake from the pan easily.
Gently pour batter evenly into greased cake pan and bake until top is light golden, and a tester comes out clean, 30 to 35 minutes.
Transfer cake to rack; cool completely.

Prepare the caramel mousse :

Whip the heavy cream to soft peaks, and reserve in the fridge.

Combine 1/3 cup sugar and 1 Tbsp water in a heavy saucepan. Bring to a rapid boil over medium high heat. Cook the sugar until deep golden brown. Turn off the heat and carefully pour heavy cream into the hot caramel. The syrup will bubble shortly, so be careful. Return to the heat if you get caramel bits and stir until it is one smooth liquid.

In a small bowl, sprinkle the gelatin over the water, and let it sit.

Whisk shortly the egg and the yolks. Combine 1/2 cup sugar and 1 Tbsp water in a heavy saucepan. Bring to a rapid boil over medium high heat, and cook until it reaches 233°F. Add it to the yolk mixture and continue to whisk on medium high until it triples in volume and cools to room temperature.

Melt the gelatin in the microwave for 20 seconds and add it to the caramel. Mix the caramel with the egg preparation. Finally add the heavy cream to the mousse base and fold gently together.

Assembly :

Put the hazelnut cake on a serving dish, in the pastry frame (or in the baking pan if you don’t have any pastry frame). Spread the pear dices over, and cover with the caramel mousse. Freeze the cake for 2 hours before decorating with the glaze.
Arrange some pear slices over the cake.
Bring the poaching syrup to a boil, add the gelatin and stir until completely dissolved. Let cool at room temperature before pouring over the cake. Reserve in the fridge before serving.


Mélodie d'Automne : noisettes, poires et mousse caramel

Pour le biscuit :
4 blancs d’œufs
50g de sucre brun
75g de sucre glace
25g de farine
100g de poudre de noisette

Pour le caramel :
75g de sucre
8cl de crème

Pour la mousse :
1 œuf et 2 jaunes à température ambiante*
100g de sucre
25 cl de crème liquide
3 feuilles de gélatine
3 poires pochées ou au sirop, coupées en petit cubes

Pour la décoration (facultatif) :
1 feuille de gélatine
20cl du sirop de pochage des poires (ou le sirop de la boite)
½ poire coupée en fines lamelles

* Si vos œufs sont trop froids, le sucre cuit que vous ajoutez ensuite va se cristalliser immédiatement au lieu de s’incorporer au mélange. C’est pourquoi il est important de les sortir quelques heures avant de commencer la préparation de la mousse.

Préparez le biscuit :

Dans un bol, mélangez la farine et le sucre glace tamisés, ainsi que les noisettes en poudre.
A l’aide d’un batteur électrique, fouettez les blancs pour les rendre mousseux. Incorporez alors le sucre brun au fur et à mesure, tout en continuant de battre, puis en augmentant la vitesse. Vous devez obtenir un mélange ferme et brillant.
Ajoutez alors un tiers du mélange à base de noisettes, et incorporez le doucement à l’aide d’une cuillère en bois ou d’une maryse. Procédez de même pour les deux tiers restants.

Préchauffez le four à 180°.
Beurrez et farinez un moule à manqué ou un moule à fond amovible de 22cm de diamètre. Si vous n’avez pas de cercle à pâtisserie de la même taille ni de moule à fond amovible, vous pouvez chemiser le moule de papier sulfurisé, afin de faciliter le démoulage du gâteau une fois assemblé.

Versez le mélange dans le moule ainsi préparé, et enfournez pour 30 à 35 minutes, jusqu’à obtenir une belle couleur dorée. Laissez refroidir complètement. Si vous n’utilisez pas de cercle à pâtisserie, laissez le biscuit dans son moule.

Préparez la mousse :

Battez la crème liquide en chantilly, et réservez-la au frais.

Préparez un caramel avec les 75g de sucre et une cuillère à café d’eau. Portez à ébullition et laissez sur feu moyeu jusqu’à obtenir une couleur ambrée assez sombre. Retirez du feu, et ajoutez la crème liquide en remuant vigoureusement. Le mélange va bouillonner et fumer, c’est normal. S’il vous reste quelques morceaux de sucre non dissout, portez à nouveau sur le feu, au plus doux, en remuant. Retirez du feu et laissez à température ambiante.

Dans le bol de votre robot, battez les œufs pour les rendre mousseux. Dans une petite casserole, mouillez le sucre avec une cuillère d’eau, et portez à ébullition jusqu’à atteindre 112° (stade du soufflé. Si vous n'avez pas de thermomètre à sucre, suivez ce lien pour la méthode empirique).
Versez le sucre cuit en filet sur les œufs tout en battant. Autant que possible, le sucre doit être versé directement sur les œufs, non sur le fouet ou sur le bol… Augmentez ensuite la vitesse et battez le mélange jusqu’à ce qu’il triple de volume.
Faites ramollir les 3 feuilles de gélatine dans un bol d’eau froide. Puis égouttez les, et faites les chauffer (soit 20 secondes au micro-onde, soit dissoute dans une cuillère à soupe d’eau bouillante). Mélangez ensuite avec le caramel encore chaud, et versez le tout dans la préparation aux œufs.
Incorporez ensuite doucement la crème battue avec une maryse.

Montage :

Placez le disque de biscuit sur un plat de service, à l’intérieur du cercle à entremet. Répartissez les morceaux de poires sur le biscuit, et recouvrez avec la mousse.
Placez 2 heures au congélateur avant de décorer.
Disposez les lamelles de fruit sur le gâteau.
Mélangez la gélatine (préalablement ramollie et réchauffée, comme pour la mousse) avec le sirop de pochage des poires, et versez-le sur la mousse en vous aidant d’un pinceau.
Placez au frais avant de retirer le cercle à entremet et de servir.
La suite, please

Long due : meeting with the winter squash

By Mélanie, on Sunday, November 16, 2008

I should have told you about this for a long time. Like, for example, when I first made it, as an invitation for fall to come. It was early September, leaves were barely changing colors and lunch could still be appreciated on a terrace. This was my way to feel the seasonal change.

Or when a light breeze caused a golden fall of leaves, making me realize that autumn had arrived. I wonder if I used to be blind, or if the days were cooler and sunnier than usual, but I had never seen such vibrant red and gold in the trees. It was exactly what everyone would dream of for this season.


Or when I understood time had passed by again, and that we were now experiencing what people call “typical November weather” (I hate when they say that. It’s my month. So it shall not be criticated!). And anyway, I love that weather too. A dark grey sky, the sound of the wind blowing, heavy rain*, it makes me feel alive (ok, and also a little bit like a character of a Brontë sisters’novel).
* Well, except when I'm wearing my new shoes...

But now that a winter coat, and sometimes even mitten, are necessary to go outside and face the cold temperatures, I fell it’s high time for me tell you how I got to like winter squash. See, I was highly intrigued by them. Except for pumpkin and red kuri, we don’t cook/find a lot of winter squash in France. I tried them once in the US, but the flavors were too mild and cloying (just like pumpkin pie… I know this will sound as a sacrilege for some of you…). But then, I saw this cutie in the grocery store.

I had no idea what to do with it, but I just couldn't resist. I searched on the web to understand how I should cook it, and how the flavors would develop with other ingredients.

I took advantage of its nice shape for the presentation, and stuffed it with brown rice, celery, and some ground hazelnut, which complement ideally the nutty and sweet taste of the squash. And this is how I discovered how good it was!


Stuffed sweet dumpling squash
For 2

1 sweet dumpling squash
1 Tbsp olive oil
1 onion
1 branch of celery
1 tsp salt & pepper
1 tsp nutmeg
1 Tbsp dried parsley
¼ cup brown rice
1/3 cup hazelnuts
1/8 cup dried cranberries (optional)

Preheat the oven to 400°F. Cut through the stem end of the squash with a sharp knife. Scoop out the seeds and place cut-side down on the baking sheets. Bake for 40 minutes. Reduce the oven heat to 375°F.

While the squash is in the oven, cook the brown rice in the water.
Finely slice the onion and the celery. In a small sauté pan, heat the olive oil and sauté the celery and onion over medium heat until just softened. Stir in the parsley, pepper, nutmeg, and salt, and take the pan off the heat.

Use a food processor to grind the hazelnuts to powder.

When the squash is cooked, use a spoon to scoop out the flesh, leaving a bit behind to keep the skins from tearing. Mash the flesh coarsely with the ground nuts and the sautéed mixture.
Add the brown rice and the cranberries to the squash in the bowl and mix thoroughly.

Stuff the mixture into the squash shell. Bake for 20 minutes, then close with the lid and serve.


Patidou farci au riz brun et aux noisettes
Pour 2 personnes

1 patidou
1 cuillère à soupe d’huile d’olive
1 oignon
1 branche de céleri
1 pincée de sel, de poivre et de muscade
2 cuillères de persil
½ bouillon cube
50 g de riz brun
30 g de noisettes
20g d’airelles séchées (facultatif)

Préchauffez le four à 200°.

A l’aide d’un grand couteau, découpez le dessus du patidou pour avoir un couvercle. Videz les graines qui sont à l’intérieur de la courge. Posez la à l’envers dans un plat (n’oubliez pas le couvercle) et enfournez pour 40 minutes.

Pendant ce temps, émincez l’oignon et le céleri.
Faites cuire le riz dans une casserole d’eau bouillante salée avec le bouillon cube.
Faites chauffer l’huile dans une casserole. Lorsque l’huile est chaude, faites revenir les oignons. Lorsqu’ils ont atteint une couleur translucide, ajoutez le céleri et laissez dorer. Ajoutez sel, poivre et persil, et retirez ensuite du feu.

Dans votre mixeur, broyez les noisettes.

Une fois que la courge est cuite, creusez la chair avec une cuillère (attention de ne pas casser la peau de la courge, qui est assez fine et fragile) et passez la au mixeur avec les noisettes, les oignons et le céleri. Mélangez avec le riz égoutté et les airelles pour ensuite farcir la courge.

Remettez là dans le plat, et remettez au four à 180° pour 20 minutes.
Refermez la courge avec le couvercle, et servez.
La suite, please

Salted caramel + chocolate, the perfect combo

By Mélanie, on Sunday, November 9, 2008

This summer, I spent one week at the Ile de Ré. Not only did I bake the addictive plum and almond tart I told you about, but I also had one of the best chocolate cake ever*.
Now, I’m very bad with naming chocolate cakes. I’ve seen everything under every name. I thought a “moelleux” would be more cakey, like a traditional grand-mother cake, while the “fondant” would be more dense and chocolaty, sometimes with melting center. But then I had a “moelleux coeur fondant” (melting heart), which, basically, was a lava cake, a “fondant” which was more cream-like, a brownie that tasted like a fondant, and now, I’m lost!
If you have answers to my metaphysical questions, I need your help...

But, back to the cake.
It was rich, but not too dense. On the contrary, the border was very soft and cake-like, and the centre was slightly undercooked, melting in my mouth. Have I told you before that I’m not a huge fan of chocolate? If I had to choose a dessert, it’d be a fruit pie without hesitation. But this cake was heaven.
Maybe the difference was that behind the chocolate, I could taste salted butter. Better than that, salted butter caramel.

It was quite logical that they would use butter with Fleur de sel, because the Ile de Ré is one of the famous place where it is produced. The name Fleur De Sel comes from the aroma of violets that develops as the salt dries. It is the least salty, purest part of the saline. This artisan sea salt is comprised of "young" crystals that form naturally on the surface of salt evaporation ponds. They are hand harvested by traditional "Paludiers" (salt farmers).

Of course, I tried to reproduce it at home. The first attempt was not bad, but nothing exceptional. The second went directly to the garbage. The third one was close, but then, I got tired (or, more exactly, I got apples!!). Fortunately, a post on one of my favorite blog put me on the right track again, and, after two more attempts, here it is!


*The competition for the Best chocolate cake is raging between the 3 finalists: the chocolate cake from the farmers’market at Les Portes en Ré, the brownie from Le Pain Quotidien, and the moelleux from le Cak’T at Loches.


Salted caramel chocolate cake

3/4 cup sugar
3 Tbsp heavy cream
1 1/2 stick salted butter
2 eggs + 2 yolks
5 oz dark chocolate (60%)
4 Tbsp flour

Preheat oven to 350°.

In a large saucepan, bring half of the sugar and 1 teaspoon water to a boil, stirring the sugar as it melts. Cook until the sugar has a golden color. Add the butter and the cream and stir it in.
Remove from heat and add chocolate gradually, whisking it until you get a smooth sauce.

In another bowl, beat with an electric mixer the eggs, yolks and rest of sugar. Add the chocolate caramel mixture, and the flour, while beating until well incorporated.

Pour the mixture in a cake pan or into cupcake liners, and bake about 15 minutes for the cupcakes, and 25-30 minutes for an entire cake. The center should still be soft and slightly uncooked.
Let cool and serve at room temperature.


Gâteau au chocolat au beurre salé

150g de sucre
50g (5cl) de crème liquide
140g de beurre demi-sel
2 œufs et 2 jaunes
140g de chocolat
40g de farine

Préchauffez le four à 180°.

Dans une casserole de taille moyenne, mouillez 75g de sucre avec 1 cuillère à soupe d’eau. Portez à ébullition, et laissez sur le feu jusqu’à ce que le caramel ait une jolie couleur ambrée. Ajoutez le beurre en morceaux et la crème, et mélangez. (Faites attention à ne pas vous brûler, car cela créera de gros bouillons au moment de l’ajout).
Retirez du feu et incorporez le chocolat en plusieurs fois, en remuant jusqu’à ce qu’il soit complètement fondu.

Dans un autre récipient ou dans le bol de votre robot, battez les œufs, les jaunes avec le sucre restant pour les blanchir. Ajoutez le chocolat au caramel et la farine, en battant jusqu’à ce que le mélange soit homogène.

Versez la préparation dans un moule à manqué beurré et fariné, ou bien dans de petites caissettes en papier. Faites cuire 15 minutes (pour des caissettes) ou 25-30 minutes (pour un moule à manqué). Le gâteau doit encore être fondant et légèrement coulant en son centre.
Laissez refroidir un peu avant de le démouler et de le servir.

La suite, please

No tricks, just treats

By Mélanie, on Friday, October 31, 2008

I’ve always regretted not to have a real Halloween. I tried. The first year I paid attention to the event (when I started being interested by the US), I prepared a huge bowl full of candies, and I waited. I waited, and I waited. And nobody came. Well, this is not quite true. A typical little French, showing their rebellion to any Anglo-Saxon tradition, the kids showed up either 3 days before (when I did not have the candies yet) or two days after (when my brother had already eaten everything!).

A few year later, when the word had spread in the neighborhood that we’d give candies for Halloween, I became a little too enthusiastic, and tried to built a gingerbread house. Oh, never again! Not only did it look like it had just undergone an earthquake, but the kids only wanted the candies…

So you see, I kind of forgot about doing special things for Halloween. It’s not like in the US. Can you believe that when I worked there, we even had a party at the office?! Nobody really worked that day, busy with decorating the office for the Halloween contest (the pictures are from the Financial Analysis department). It was unbelievable.
But this year, I’m cooking for other people than myself. So of course, I could not resist to having a special Halloween Menu. (Plus, I love having a theme when I’m cooking, it’s much more fun!).


So here’s the menu today :

Butternut with it’s caramelized onions (did I say onions? no, I mean worms of course) galette

Seriously, you’ve got to try this one. I know it is long (and dangerous for your fingers) to cut the butternut, but it’s worth it. This galette is so good, it’s the 3rd time I make since I read it on Deb’s blog, 3 weeks ago. I’m going to try other fillings, but don’t wait that long! The recipe is here.

Puffy Jack’o’lantern with tomato and cream sauce

Marble Pumpkin and chocolate cupcakes

I love this recipe. I’m not a huge fan of pumpkin, but this cake is moist and tender, and the sweetness of the pumpkin is not overwhelming thanks to the cocoa. It’s great for every time of the hour. Plus, it's from Cooking Light.

Happy Halloween!
La suite, please

Apple cake, German way

By Mélanie, on Monday, October 27, 2008

A few weeks ago, as I went grocery shopping, I froze in front of a very interesting stand. Cooking books, again (!), you’re gonna say? No! No cooking book, no weird material, no baking form (although I could reach a record, with almost 20 baking forms my 36 square foot kitchen). Nothing like that. The simplest and most natural of all. Apples and pears, directly from the orchard.
Maybe because of the great number of varieties (and we all know my problem with having to choose) or because of the blue sky but crisp air, of the leaves turning yellow and red, and of all those clear signs that fall is here* , I got out with 5 kg (about 10 pounds) of fruits.

Finding how to use them was not a problem. First, there’s the 2-3 fruits a day routine. Then there was some compote for everyone’s lunch. I couldn’t resist to baking Deb’s mom apple cake. Then I chopped, cooked and froze the rest, waiting for inspiration. It did come pretty fast, thanks to my mother: “You’re freezing the apples? Great, you’ll have it ready whenever you want your grand-mother’s apple cake.” That was enough for me to want it. And my week-end in Düsseldorf (Germany), seeing it in every bakery (Gedeckter Apfelkuchen is a German speciality you’ll find in many backerei) did not help either.

Of course, the best apple cakes are always the one you used to eat as a child, whether it’s your mother’s or grand-mother’s recipe. It’s my favourite, with lots of murbeteig (kind of like a sweet pie crust, but with baking powder), and the acidity of the lemon glaze balancing the sweet apple taste. But I wasn’t sure of being objective. I hesitated to give you the recipe.
Then I brought two slices for my colleagues. The first comment was “This is not ok at all. The slice is too small!” The other one was a quick request for the recipe.
Is there anything more to say?

* Don’t you think there’s still a part of instinct pushing us to do strange things? Like buying enough food on a clear autumn day to survive all winter? Or cleaning and re-decorating your apartment (even if it involves moving all the furniture 2 or 3 times) every spring? Or am I just using this as an excuse for my compulsory buying??


German apple Cake

2 pounds boskop apples (about 5)
1 Tbsp sugar
1 Tbsp water
1 cup butter
½ cup sugar
2 /3 cup flour
1 pinch salt
1 tsp baking powder
1 egg

For the glaze (optional)
The juice of half a lemon
1 cup confectioner sugar

Peel and core the apples. Cut them in big cubes and combine with the tablespoon sugar and the water in a medium saucepan; bring to a boil over medium-high heat. Reduce heat, and simmer 10 minutes or until fruit is tender, stirring gently. Remove from heat; cool.

Prepare the shortbread crust. Beat butter at medium speed with an electric mixer until creamy. Gradually add sugar and egg, beating well.
Combine flour, baking powder and salt ; add to butter mixture, beating at low speed until blended. Flatten the dough into a thick disc, wrap in plastic and refrigerate at least 1 hour.

Preheat oven to 350°C.
Sprinkle your work surface as well as your rolling pin with flour. Roll out about 2/3 of the dough into a circle one-seventh-inch thick. Starting at 1 edge of dough, wrap dough around rolling pin. Place rolling pin over a 9-inch glass pie plate, and unroll dough over pie plate. Gently press dough into pie plate. Stir apples into crust. Roll remaining dough as directed before, rolling dough to about 1/7-inch thickness (13 inches wide). Place dough over filling; fold edges under, sealing to bottom crust, and crimp. Bake 35 minutes. Remove to a wire rack and let cool before transferring to a plate.

Optional : Glaze the top of the cake with lemon juice mixed with confectioner sugar.


Le gâteau aux pommes, comme en allemagne (Gedeckter Apfelkuchen)

1 kg de pommes boskop (environ 5 pommes)
1 cuillère à soupe d’eau
1 cuillère à soupe de sucre
300g de farine
100g de sucre
200g de beurre
¾ d’un paquet de levure
1 pincée de sel
1 oeuf

Pour le glaçage (facultatif)
le jus de la moitié d'un citron
100g de sucre glace

Pelez les pommes et découpez-les grossièrement en morceaux. Combinez les avec l'eau et la cuillère de sucre dans une casserole moyenne ; portez à ébullition la sur feu moyen. Réduisez le feu, et laissez compoter 10 minutes, en remuant doucement. Retirez du feu et laissez refroidir.

Préparez la pâte du gâteau. Battez le beurre à vitesse moyenne avec un mélangeur électrique jusqu'à ce qu’il soit crémeux. Ajoutez graduellement le sucre et l'oeuf, en battant bien. Combinez la farine, le sel et la levure ; ajoutez au beurre, battant à vitesse réduite jusqu'à obtenir une boule compacte. Formez un disque épais, enveloppez-le dans un film plastique et placez au froid au moins 1 heure.

Préchauffez le four à 180°.
Farinez abondamment le plan de travail ainsi que le rouleau à pâtisserie, puis étalez 2/3 de la pâte sur 3 mm d'épaisseur. Enveloppez la pate sur le rouleau à pâtisserie pour la placer dans votre moule à gateau beurré. Recouvrez le fond ainsi que les bords du moule avec la pate. Garnissez ensuite avec les pommes. Etalez la pâte restante comme précédemment, et placez la au-dessus des pommes en scellant les bords. Faites cuire 35 minutes. Déposez sur une grille et laissez refroidir avant de démouler.

Facultatif : Glacez le dessus du gâteau avec du jus de citron mélangé à du sucre glace.
La suite, please

For the birthday girl

By Mélanie, on Monday, October 20, 2008

Today’s the birthday of my most assiduous reader.

She’s having a party next week-end, and I promised her I’d bring the birthday cake. She did not ask for much, just that it’d be something with chocolate.
And of course, I couldn’t go just for simple. Oh no, I wanted something special, something good, and beautiful, and that would not crumble, or break apart when I’d try to cut it. Basically, I put myself under maximum pressure.
In order to avoid any bad surprise, I decided to practice this week-end. And this was such a good idea!! This way, on Thursday night, when I’ll bake the cake again, I’ll know not to put the caramelized sugar into the egg yolk if I don’t want to break my mixer… But that’s another story.

Anyway, on Saturday, again, I was confronted with my decision making incapacity. Meringue, brownie, dacquoise, shortbread? Mousse, ganache, cream? What the heck! I had all week-end, so why not bake 2 cakes, bring them to work, and ask my colleagues which one they prefer? I must admit I did not realize they were that complicated (well, especially the first one), but this is why I’m so glad I had the practicing session.

They liked both of them, but we had to make a choice.

And the second place is awarded to….. the hazelnut dacquoise and chocolate cake!
The dacquoise is a pastry half way between a meringue and a macaroon. In this cake, I made it with hazelnuts and almonds. And between the three layers was a chocolate mousse (actually, half way between a mousse and a butter cream).

Claire, here’s a slice of your second birthday cake. Happy birthday!


Hazelnut dacquoise and chocolate cake

For the dacquoise
1/4 cup almond powder
1/4 cup hazelnut powder
3/4 cups sugar
5 egg whites

For the chocolate buttercream
9 oz chocolate, unsweetened
1 ½ stick butter
6 egg whites
1 Tbsp sugar
3 egg yolks

Make dacquoise:

Preheat oven to 350°F.

Line 3 large baking sheets with parchment paper. With a pencil, drawn on each sheet a circle the size of your cake (about 9 inch diameter). Turn the sheets on the other side (but so you can still see the drawing).

Beat whites in mixer at medium-high speed until they just hold soft peaks. Reduce speed to medium, then add granulated sugar, a little at a time, beating, and continue to beat until whites just hold stiff, glossy peaks. Fold almond mixture in 2 batches into whites until just combined. Transfer meringue to a pastry bag and pipe the meringue onto the prepared sheets, filling in the 3 circles.

Bake for 30 to 35 minutes, switching the sheets from one rack to the other each 10 minutes. The meringue should be golden and firm.
Let the meringues cool on the sheets, and peel the meringues off the sheets carefully. The meringues may be made 1 day in advance and kept wrapped in plastic wrap at room temperature.

Make buttercream:

Chop chocolate. In a metal bowl set over a saucepan of barely simmering water melt chocolate, stirring until smooth, and let cool to 110°F. Cut butter into pieces and soften to cool room temperature.
Whisk butter with an electric mixer until creamy. While beating, add melted chocolate in 3 batches.

Beat whites in mixer at medium-high speed until they just hold soft peaks. Add granulated sugar, and continue to beat until whites just hold stiff, glossy peaks. Add egg yolks, one at a time, and continue beating at medium speed for about 30 secondes.

Gently incorporate the eggs to the chocolate mixture in 4 batches, using a whisk. The cream is now ready and should be used immediately.

Place one disk of dacquoise on the plate. Cover with 2/5th of the cream, then place another disk, 2/5th of the cream, and the last disk. Use the remaining cream to cover the cake and for the decoration.


Dacquoise aux noisettes et crème chocolat


A venir prochainement…
La suite, please

Exaggeration lesson, #1

By Mélanie, on Wednesday, October 8, 2008


I’ve been watching a lot of Grey’s anatomy episodes lately (yes, maybe this is also why I did not post more on the blog). See, the TV channel did not wait for me while I was on holidays (unbelievable, I know!) and I had the entire third season to catch up before the fourth would begin. It took much dedication, believe it...

I had no idea I had identified so much with Izzie until I found myself cursing Christina for not giving her the food processor from her wedding gifts. Izzie has been baking a lot, and she would have enjoyed it so much, she deserves it!! It took me at least 10 minutes to get over it (at that point, I think the friend I was watching it with was ready to buy me a food processor just to make me stop!)

Anyway, in one of the episodes, Izzie is worried, so she spend the night baking, and when her roommates wake up the day after, the kitchen is full with chocolate cupcakes. I don’t do that. I usually stop at midnight. Or 1:00, but just because I need to clean afterwards (does that remind you of another TV show character?? Oh, I miss FRIENDS...). I digress again.
When she’s grieving, she can’t stop baking muffins (like Monica could not stop making jams after her break-up).

I thought all that was exaggerated. Of course! It’s a TV show! And then, it was the week-end before my holidays. Hundreds of things to do (like packing for example, or reading the guide books...), no hotel nor train tickets booked, etc... I panicked. (I feel really stupid for that now, because the vacations were amazing, we really had a great time, and this hotel/train thing was not a problem). But at that time, I panicked. And, instead of methodically carrying my to do list out, I started baking. When I finished, it felt like I was on a TV show. The kitchen was just full with cookies, tartlets, meringues, etc... It took us (the 7 of us, I had to put my grand-parents to contribution!) more than 3 days to eat it all.

First, there were the cookies (3 batches, if you remember correctly…). But I also had passion fruit juice to use, and it just happens that there’s a tempting recipe in Pierre Hermé’s book that needs some. I mean, if this is not fate, what is it?? To make those apricots tartlets, you just have to prepare a pie crust, a passion fruit ganache and let the apricot marinate. It is simpler than it looks like. Because the result is nothing but basic. Not only does it look beautiful, but it is delicious. Soft and melting in the mouth. The bitterness of the chocolate contrasting with the acidity of the passion fruit and the sweetness of the apricots. You should try it. And invite friends to share them with.

But there was one drawback : I halved the quantities for the pie crust (the requested one makes 3 pie shells), but still ended up with too much. Hum, too much pie crust? And a recipe for a passion fruit tart with a crispy meringue in Bon Appetit appealing to me for years? I couldn’t stop there. So I halved the curd and the meringue quantities to fill my empty tartlets shells… The original recipe called for white chocolate between the curd and the meringue, but we all scraped it (it was just too sweet).Next time, I won’t put any. But there will be a next time. It’s like a meringue lemon pie, but even better! I’ll be crazy not to do it again!
Of course I also had too much meringue, which finished as semi-macaroons… But I’ll just stop, you’ve heard enough. Maybe you want the recipe now!


And if you’re lost, and have no idea who’s Izzie, Christina, and the others, watch tonight show on TF1, 8:50 pm, French time!


Apricot tartlets with passion fruit chocolate
From Pierre Hermé
For 24 2-inch tartlets

For the tart shell (makes 3 shells)
1 1/3 cup butter, room temperature
1 1/3 cup confectioner sugar
¼ cup almond powder
½ teaspoon sea salt flower
¼ vanilla pod
2 eggs
4 cup flour

For the fruits
10 big apricots, diced
3 Tbsp lemon juice
½ teaspoon black pepper

For the ganache
6.3 oz. bittersweet chocolate
6 Tbsp whipping cream
5 Tbsp passion fruit juice
¼ cup butter.

Prepare the pie crust. Using a food processor on pulse setting, cream the butter. Add sugar, almond powder, salt and vanilla and pulse again. Scrape down the sides of the bowl to be sure it is well mixed. Add the eggs and mix. Then add all the flour, and pulse for a few seconds, until the dough resembles coarse crumbs. It is very important not to mix the dough too long. With your hand palm, press the dough about 3 times, just until it forms a ball that holds together. Separate the dough into three balls, flatten slightly into thick disk shapes, wrap in plastic wrap, and chill for 4 hours to 2 days before working with it. You’re only going to use one disk for this recipe, so you can freeze the others (up to 2 months), for a latter use.

Preheat oven to 350°F with rack in middle.

Roll out dough into a on a floured surface with a floured rolling pin. Cut out 24 (2,5-inch) rounds and fit each round into a tartlet pan (don't trim). Prick bottoms all over with a fork and bake 15 minutes.

While pie shells are cooking, let the apricots marinate in a bowl lemon juice and pepper.

Prepare the chocolate ganache. In two separate saucepans, bring cream and passion fruit juice to a simmer. Remove the cream from heat. Add half of it to the chocolate, whisking with a spatula until smooth and melted. Add remaining cream, still whisking, then passion fruit juice. Finally, add butter in small pieces and beat until totally incorporated. Transfer ganache to a bowl and chill about 45 minutes.

Reserve 24 apricot dices for decoration.

Arrange the rest of apricot dices in the baked shells.

Spoon ganache into a pastry bag fitted with a star tip, and pipe decoratively into shells. Decorate each tartlet with an apricot dice, and serve at room temperature.


Passion fruit tartlets with meringue top
Adapted from Bon Appetit
For 24 2-inch tartlets

One disk of sugar dough for the tart shell (see above)
½ cup passion fruit juice
4 egg yolks
1 egg
3 Tbsp sugar
½ stick butter, diced
1 egg white
3 Tbsp + 2 tsp sugar

Prepare the pie crust. Using a food processor on pulse setting, cream the butter. Add sugar, almond powder, salt and vanilla and pulse again. Scrape down the sides of the bowl to be sure it is well mixed. Add the eggs and mix. Then add all the flour, and pulse for a few seconds, until the dough resembles coarse crumbs. It is very important not to mix the dough too long. With your hand palm, press the dough about 3 times, just until it forms a ball that holds together. Separate the dough into three balls, flatten slightly into thick disk shapes, wrap in plastic wrap, and chill for 4 hours to 2 days before working with it. You’re only going to use one disk for this recipe, so you can freeze the others (up to 2 months), for a latter use.

Whisk passion fruit juice, eggs and sugar in heavy large saucepan; add butter. Whisk over medium-low heat until butter melts. Stir until filling thickens, about 10 minutes (do not boil). Transfer to another bowl, press plastic wrap onto surface and chill until firm, at least 4 hours.

Preheat oven to 350°F with rack in middle.

Roll out dough into a on a floured surface with a floured rolling pin. Cut out 24 (2,5-inch) rounds and fit each round into a tartlet pan (don't trim). Prick bottoms all over with a fork and bake 15 minutes.

While the crust is baking, prepare meringue. Using electric mixer, beat egg white until soft peaks form. Gradually add sugar, beating until meringue is stiff and shiny. Spoon into pastry bag and pipe small disks the size of the tartlets on a sheet of parchment.

Reduce the oven temperature to 300°F, and bake meringue until pale golden, about 25 minutes. Cool on sheet.

Spread curd in crust, and place meringue atop tart. Chill until serving.


Tartelettes aux abricots passionnément chocolat
Recette de Pierre Hermé
Pour 24 Tartelettes

Pour la pâte sucrée (pour 3 fonds de tarte) :
285g de beurre à température ambiante
150g de sucre glace
50g d’amande en poudre
½ cuillère à café de fleur de sel
¼ de gousse de vanille
2 œufs
500g de farine

Pour les fonds de tartelettes :
10 gros abricots coupés en dés
3 cuillères à soupe de citron
1 pincée de poivre noir

Pour la ganache :
180g de chocolat
90g de crème liquide
75g de jus de fruit de la passion
45g de beurre.

Faites la pâte sucrée. Battez rapidement le beurre dans le bol d’un robot mixeur, de manière à obtenir un mélange crémeux. Ajoutez le sucre glace, la poudre d’amande, le sel et les graines de vanille. Mélangez et raclez les parois du bol avec une spatule si besoin. Le mélange doit être homogène. Ajoutez les œufs, mélangez. Versez la farine dans le bol, et mélangez quelques secondes, le temps de former une pâte grumeleuse. Il ne faut pas trop travailler la pâte. Fraisez (c’est l’action de travailler avec la paume de la main) rapidement et formez 3 boules de pâtes. Aplatissez et enveloppez-les dans un film plastique pour reposer au frais pendant au moins 4 heures. Vous n’utiliserez qu’un des trois disques. Vous pouvez conserver les autres au congélateur pendant 2 mois en vue d’une prochaine utilisation…

Après le temps de repos, préchauffez le four à 175°. Beurrez et farinez vos moules à tartelettes.

Farinez abondamment le plan de travail ainsi que le rouleau à pâtisserie, puis étalez la pâte sur 2 à 3 mm d'épaisseur.

A l’aide d’un emporte-pièce de 6 cm de diamètre ou d’un verre d’un diamètre légèrement supérieur à vos moules, découpez des disques dans la pâte. Foncez les moules avec ces disques et mettez à cuire 15 minutes.

Pendant ce temps, mettez les dés d’abricots à macérer dans un bol avec le jus de citron et le poivre.

Préparez la ganache. Dans une casserole à fond épais, portez la crème à ébullition sur feu moyen. Dans une autre casserole, portez le concentré de fruit de la passion à ébullition.

Dans un grand saladier, versez la moitié de la crème sur le chocolat en morceaux. Vous devez mélanger à la maryse, en formant des grands cercles, de manière à incorporer le chocolat à la crème. Versez ensuite le reste de la crème, toujours en remuant, puis le jus de fruit. Vous allez obtenir un mélange lisse et brillant. Incorporez alors le beurre pommade en petits morceaux. Laissez refroidir.

Réservez 24 dés d’abricots pour la décoration.

Répartissez le reste dans le fond des tartelettes. Déposez ensuite la ganache avec une poche à douille, et décorez d’un dé d’abricot par tartelette.

Servez à température ambiante.


Tartelettes meringuées au fruit de la passion
Adapté de Bon Appetit
Pour 24 tartelettes

Un disque de pâte sucrée (cf. recette ci-dessus)
12,5 cl de jus de fruit de la passion
4 jaunes d’œufs
1 œuf
35g de sucre
40g de beurre
1 blanc d’œuf
45g de sucre

Mélangez le jus de fruit de la passion, les œufs et le sucre dans une grande casserole à fond épais. Ajoutez alors le beurre coupé en petits morceaux. Mettez la casserole sur feu moyen et faites épaissir le mélange en remuant constamment (environ 10 minutes, attention, la crème ne doit pas bouillir). Transférez dans un bol, couvrez d’un morceau de plastique et laissez au froid au moins 4 heures, pour que la crème soit ferme.

Préchauffez le four à 175°. Beurrez et farinez vos moules à tartelettes.

Farinez abondamment le plan de travail ainsi que le rouleau à pâtisserie, puis étalez la pâte sur 2 à 3 mm d'épaisseur.

A l’aide d’un emporte-pièce de 6 cm de diamètre ou d’un verre d’un diamètre légèrement supérieur à vos moules, découpez des disques dans la pâte. Foncez les moules avec ces disques et mettez à cuire 15 minutes.

Pendant que les fonds de tartelettes cuisent, préparez la meringue. Avec un fouet électrique, ou dans le bol d’un robot, battez le blanc d’œufs en neige. Ajoutez progressivement le sucre tout en continuant de battre jusqu’à ce que la meringue soit ferme et d’un blanc luisant.

Couvrez votre plaque à pâtisserie d’une feuille de papier sulfurisé. A l’aide d’une poche à douille, formez 24 disques de meringue de la taille de vos tartelettes.

Réduisez la température du four à 150° et faites cuire les meringues environ 25 minutes. Laissez refroidir.

Vous pouvez ensuite garnir le fond des tartelettes avec la crème de fruit de la passion, et recouvrir avec les meringues.

Réservez au frais jusqu’au moment de servir.

La suite, please