Revelation : this blog is not only about baking, but also about cooking. If you look at my recipe list, you couldn't guess, right? ;-)
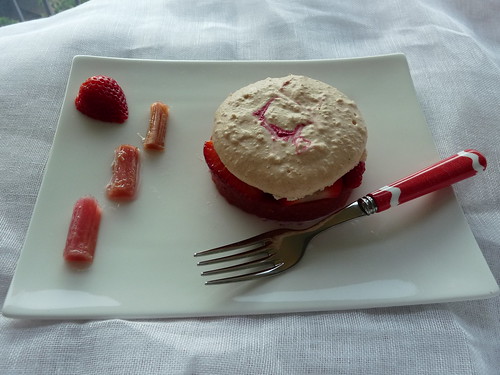
Well, here's the thing : I've got this stupid fear of disappointing you with a savoury recipe. I don't do anything very elaborate, so why would you care? And let's be honest : I find it much more difficult to make a salad look appetizing than some, hum, let's say, raspberry pie... I'm sure you agree, non?
Well, here's the thing : I've got this stupid fear of disappointing you with a savoury recipe. I don't do anything very elaborate, so why would you care? And let's be honest : I find it much more difficult to make a salad look appetizing than some, hum, let's say, raspberry pie... I'm sure you agree, non?
So actually, I had planned to share my first cupcakes today. But then, I did the frosting in the morning, before leaving for work, and did not note the quantities. I need to check that before telling something awfully wrong...
What a better opportunity to finally open my savoury folder, just waiting to be shared?
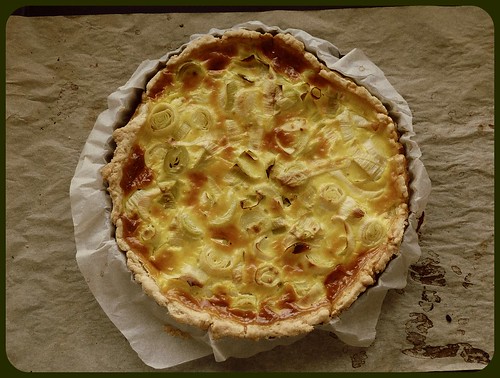
This leek tart is quite rustic. Simple to make and comforting. Served warm with some salad, it's a delicious dinner. But because of the cream cheese in the custard, it holds together very well, which makes it perfect for transportation. You'll enjoy it cold, for lunch, or with your friends in the train on a week-end trip. Isn't it picnic time soon??
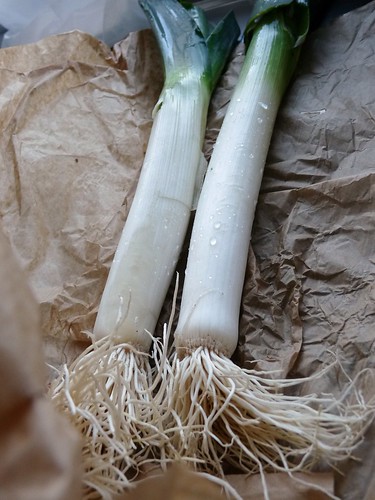
The recipe is very straightforward : start with a simple pie dough. Cut, clean and blanch the leeks. For the custard, take the best of a quiche and of a cheesecake, beating the eggs with a little cream cheese. Don't forget to add the deep flavour of grated nutmeg. Put in your oven, it's gonna be ready soon.
What a better opportunity to finally open my savoury folder, just waiting to be shared?
This leek tart is quite rustic. Simple to make and comforting. Served warm with some salad, it's a delicious dinner. But because of the cream cheese in the custard, it holds together very well, which makes it perfect for transportation. You'll enjoy it cold, for lunch, or with your friends in the train on a week-end trip. Isn't it picnic time soon??
The recipe is very straightforward : start with a simple pie dough. Cut, clean and blanch the leeks. For the custard, take the best of a quiche and of a cheesecake, beating the eggs with a little cream cheese. Don't forget to add the deep flavour of grated nutmeg. Put in your oven, it's gonna be ready soon.

Pie dough
2/3 cup butter
3 Tbsp cold water
1 egg yolk
2 cups flour
1 Tbsp salt
Stir together the flour and salt with a fork to blend. Make a well in the centre, and add the fat and the yolk. Blend into the flour using your fingers.
Drizzle a few tablespoons of the ice water over the surface of the flour mixture and quickly rub the water into the flour. Continue to add the water, a tablespoon or so at a time, just until it holds together.
Gather and press the dough into a ball, wrap well, and let chill in the refrigerator for at least 1 hour.
Unwrap the dough, place it on a floured work surface, and scatter a little flour over the top. Roll out the dough into an even round about 1/8 inch thick.
Fold the dough in half or roll it loosely around the rolling pin, and gently lift and position it over the pan. Unfold or unroll and ease the dough into the pan without stretching, making sure that the pan sides and the rim are evenly covered. Press the dough gently against the sides and bottom. Trim the overhang to 1 inch. Tuck the dough overhang under itself and flute the edges.
Prick the pastry all over with the tines of a fork. Bake it 15 minutes. Remove from the oven and reserve.
Rustic leeks tart
1 pie dough, pre-baked
3 medium leeks
3 eggs
4 oz. cream cheese
7 Tbsp half and half (or 4 Tbsp cream and 3 Tbsp milk)
1/2 tsp grated nutmeg
1 tsp salt
(1/4 tsp pepper)
Preheat oven to 375°F.
Prepare the leeks : Keep only the white and pale green parts and slice. Place the leek slices into a bowl filled with cold water. Swish the pieces of leek around in the bowl of water with your hands. Rub the leek pieces to remove any sand and dirt that may be on the slices, and strain.
Blanch in boiling water during 2 minutes, then strain and dry the slices on paper towels.
In a medium-sized bowl whisk together the eggs and the cream cheese until they are broken up, then whisk in the milk and the cream. Season with salt, nutmeg and pepper.
Arrange the leeks evenly over the pastry. Pour the custard mixture over it. Place the tart on a baking sheet and bake it in the middle of the oven until the top is golden and puffed and the custard is cooked through, about 40 minutes.
Remove from the oven and let cool 10 minutes before serving. You can also eat it at room temperature.
Pâte brisée
250g de farine
5g de sel
125g de beurre ramolli
1 jaune d'oeuf
5cl d'eau froide
Versez la farine et le sel dans un bol. Faites un puit au milieu duquel vous mettrez le beurre et le jaune d'oeuf. Incorporez tous les éléments du bout des doigts. Ajoutez l'eau au fur et à mesure jusqu'à obtenir une pâte homogène.
Formez une boule avec la pâte, aplatissez-la et enveloppez-la dans un film plastique pour reposer au frais pendant au moins 1 heure.
Après le temps de repos, préchauffez le four à 180°. Beurrez et farinez le moule à tarte.
Farinez abondamment le plan de travail ainsi que le rouleau à pâtisserie, puis étalez la pâte sur 2 à 3 mm d'épaisseur.
Foncez le moule avec ce disque, piquez le fond avec une fourchette. Faites cuire 15 minutes. Sortez du four et réservez pour la tarte.
Tarte rustique aux poireaux
1 fond de pâte brisée pré-cuit
3 poireaux de taille moyenne
3 oeufs
100g de fromage à tartiner (type St Moret)
10cl de crème liquide legère
10cl de lait (ecrémé ou demi-ecrémé)
1 demi cuillère à café de noix muscade moulue
1 cuillère à café de sel
Préchauffez le four à 180°.
Préparez les poireaux : enlevez les racines et les feuilles, ne gardant que 5cm de la partie verte.
Découpez les tiges en rondelles, et nettoyez les dans un grand bol d'eau froide. Laissez les tremper un moment pour que les impuretés tombent au fond, et égouttez les. Faites les blanchir (cuire 2 minutes dans une casserole d'eau bouillante).
Pendant ce temps, dans un bol, mélangez au fouet les 3 oeufs et le fromage à tartiner. Une fois que la préparation est homogène, incorporez la crème, le lait, la muscade et le sel.
Disposez les poireaux sur le fond de tarte pre-cuit, et versez l'appareil dessus. Faites cuire 40 minutes, jusqu'à ce que la tarte ait une jolie couleur dorée et soit légèrement gonflée.
Laissez refroidir 10 minutes avant de déguster.
La suite, please
2/3 cup butter
3 Tbsp cold water
1 egg yolk
2 cups flour
1 Tbsp salt
Stir together the flour and salt with a fork to blend. Make a well in the centre, and add the fat and the yolk. Blend into the flour using your fingers.
Drizzle a few tablespoons of the ice water over the surface of the flour mixture and quickly rub the water into the flour. Continue to add the water, a tablespoon or so at a time, just until it holds together.
Gather and press the dough into a ball, wrap well, and let chill in the refrigerator for at least 1 hour.
Unwrap the dough, place it on a floured work surface, and scatter a little flour over the top. Roll out the dough into an even round about 1/8 inch thick.
Fold the dough in half or roll it loosely around the rolling pin, and gently lift and position it over the pan. Unfold or unroll and ease the dough into the pan without stretching, making sure that the pan sides and the rim are evenly covered. Press the dough gently against the sides and bottom. Trim the overhang to 1 inch. Tuck the dough overhang under itself and flute the edges.
Prick the pastry all over with the tines of a fork. Bake it 15 minutes. Remove from the oven and reserve.
Rustic leeks tart
1 pie dough, pre-baked
3 medium leeks
3 eggs
4 oz. cream cheese
7 Tbsp half and half (or 4 Tbsp cream and 3 Tbsp milk)
1/2 tsp grated nutmeg
1 tsp salt
(1/4 tsp pepper)
Preheat oven to 375°F.
Prepare the leeks : Keep only the white and pale green parts and slice. Place the leek slices into a bowl filled with cold water. Swish the pieces of leek around in the bowl of water with your hands. Rub the leek pieces to remove any sand and dirt that may be on the slices, and strain.
Blanch in boiling water during 2 minutes, then strain and dry the slices on paper towels.
In a medium-sized bowl whisk together the eggs and the cream cheese until they are broken up, then whisk in the milk and the cream. Season with salt, nutmeg and pepper.
Arrange the leeks evenly over the pastry. Pour the custard mixture over it. Place the tart on a baking sheet and bake it in the middle of the oven until the top is golden and puffed and the custard is cooked through, about 40 minutes.
Remove from the oven and let cool 10 minutes before serving. You can also eat it at room temperature.
Pâte brisée
250g de farine
5g de sel
125g de beurre ramolli
1 jaune d'oeuf
5cl d'eau froide
Versez la farine et le sel dans un bol. Faites un puit au milieu duquel vous mettrez le beurre et le jaune d'oeuf. Incorporez tous les éléments du bout des doigts. Ajoutez l'eau au fur et à mesure jusqu'à obtenir une pâte homogène.
Formez une boule avec la pâte, aplatissez-la et enveloppez-la dans un film plastique pour reposer au frais pendant au moins 1 heure.
Après le temps de repos, préchauffez le four à 180°. Beurrez et farinez le moule à tarte.
Farinez abondamment le plan de travail ainsi que le rouleau à pâtisserie, puis étalez la pâte sur 2 à 3 mm d'épaisseur.
Foncez le moule avec ce disque, piquez le fond avec une fourchette. Faites cuire 15 minutes. Sortez du four et réservez pour la tarte.
Tarte rustique aux poireaux
1 fond de pâte brisée pré-cuit
3 poireaux de taille moyenne
3 oeufs
100g de fromage à tartiner (type St Moret)
10cl de crème liquide legère
10cl de lait (ecrémé ou demi-ecrémé)
1 demi cuillère à café de noix muscade moulue
1 cuillère à café de sel
Préchauffez le four à 180°.
Préparez les poireaux : enlevez les racines et les feuilles, ne gardant que 5cm de la partie verte.
Découpez les tiges en rondelles, et nettoyez les dans un grand bol d'eau froide. Laissez les tremper un moment pour que les impuretés tombent au fond, et égouttez les. Faites les blanchir (cuire 2 minutes dans une casserole d'eau bouillante).
Pendant ce temps, dans un bol, mélangez au fouet les 3 oeufs et le fromage à tartiner. Une fois que la préparation est homogène, incorporez la crème, le lait, la muscade et le sel.
Disposez les poireaux sur le fond de tarte pre-cuit, et versez l'appareil dessus. Faites cuire 40 minutes, jusqu'à ce que la tarte ait une jolie couleur dorée et soit légèrement gonflée.
Laissez refroidir 10 minutes avant de déguster.