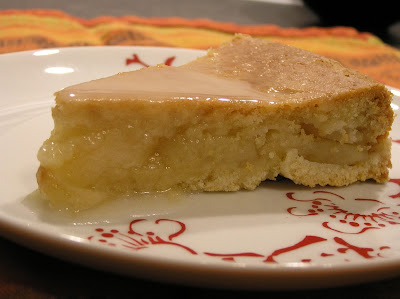
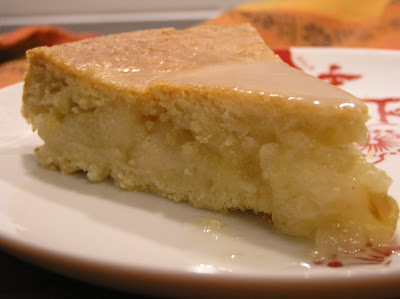
But there was one drawback : I halved the quantities for the pie crust (the requested one makes 3 pie shells), but still ended up with too much. Hum, too much pie crust? And a recipe for a passion fruit tart with a crispy meringue in Bon Appetit appealing to me for years? I couldn’t stop there. So I halved the curd and the meringue quantities to fill my empty tartlets shells… The original recipe called for white chocolate between the curd and the meringue, but we all scraped it (it was just too sweet).Next time, I won’t put any. But there will be a next time. It’s like a meringue lemon pie, but even better! I’ll be crazy not to do it again!
Of course I also had too much meringue, which finished as semi-macaroons… But I’ll just stop, you’ve heard enough. Maybe you want the recipe now!
And if you’re lost, and have no idea who’s Izzie, Christina, and the others, watch tonight show on TF1, 8:50 pm, French time!Apricot tartlets with passion fruit chocolateFrom Pierre HerméFor 24 2-inch tartletsFor the tart shell (makes 3 shells)1 1/3 cup butter, room temperature
1 1/3 cup confectioner sugar
¼ cup almond powder
½ teaspoon sea salt flower
¼ vanilla pod
2 eggs
4 cup flour
For the fruits
10 big apricots, diced
3 Tbsp lemon juice
½ teaspoon black pepper
For the ganache
6.3 oz. bittersweet chocolate
6 Tbsp whipping cream
5 Tbsp passion fruit juice
¼ cup butter.
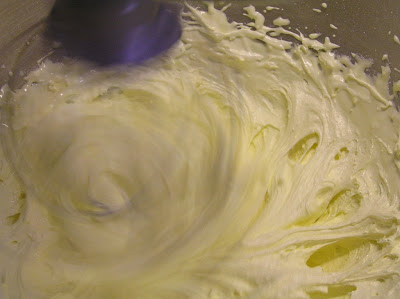
Prepare the pie crust. Using a food processor on pulse setting, cream the butter. Add sugar, almond powder, salt and vanilla and pulse again. Scrape down the sides of the bowl to be sure it is well mixed. Add the eggs and mix. Then add all the flour, and pulse for a few seconds, until the dough resembles coarse crumbs. It is very important not to mix the dough too long. With your hand palm, press the dough about 3 times, just until it forms a ball that holds together. Separate the dough into three balls, flatten slightly into thick disk shapes, wrap in plastic wrap, and chill for 4 hours to 2 days before working with it. You’re only going to use one disk for this recipe, so you can freeze the others (up to 2 months), for a latter use.
Preheat oven to 350°F with rack in middle.
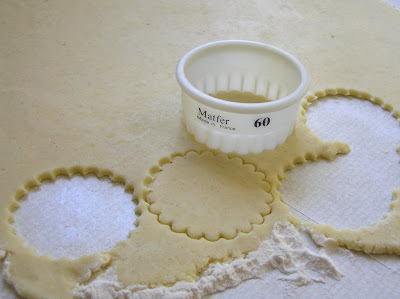
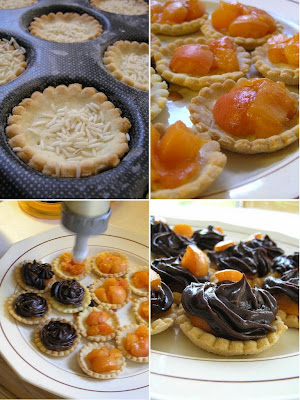
Roll out dough into a on a floured surface with a floured rolling pin. Cut out 24 (2,5-inch) rounds and fit each round into a tartlet pan (don't trim). Prick bottoms all over with a fork and bake 15 minutes.
While pie shells are cooking, let the apricots marinate in a bowl lemon juice and pepper.
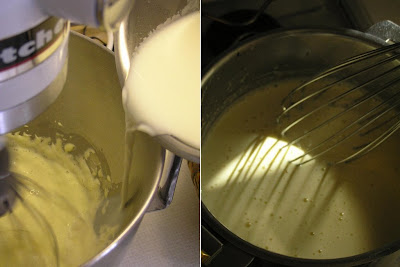
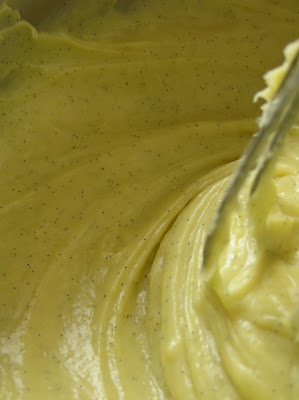
Prepare the chocolate ganache. In two separate saucepans, bring cream and passion fruit juice to a simmer. Remove the cream from heat. Add half of it to the chocolate, whisking with a spatula until smooth and melted. Add remaining cream, still whisking, then passion fruit juice. Finally, add butter in small pieces and beat until totally incorporated. Transfer ganache to a bowl and chill about 45 minutes.
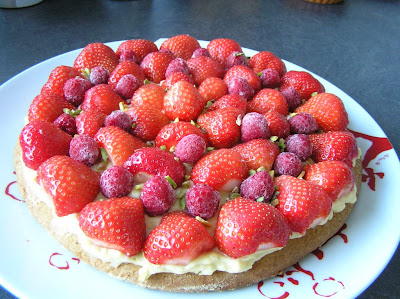
Reserve 24 apricot dices for decoration.
Arrange the rest of apricot dices in the baked shells.
Spoon ganache into a pastry bag fitted with a star tip, and pipe decoratively into shells. Decorate each tartlet with an apricot dice, and serve at room temperature.
Passion fruit tartlets with meringue topAdapted from Bon AppetitFor 24 2-inch tartletsOne disk of sugar dough for the tart shell
(see above)½ cup passion fruit juice
4 egg yolks
1 egg
3 Tbsp sugar
½ stick butter, diced
1 egg white
3 Tbsp + 2 tsp sugar
Prepare the pie crust. Using a food processor on pulse setting, cream the butter. Add sugar, almond powder, salt and vanilla and pulse again. Scrape down the sides of the bowl to be sure it is well mixed. Add the eggs and mix. Then add all the flour, and pulse for a few seconds, until the dough resembles coarse crumbs. It is very important not to mix the dough too long. With your hand palm, press the dough about 3 times, just until it forms a ball that holds together. Separate the dough into three balls, flatten slightly into thick disk shapes, wrap in plastic wrap, and chill for 4 hours to 2 days before working with it. You’re only going to use one disk for this recipe, so you can freeze the others (up to 2 months), for a latter use.
Whisk passion fruit juice, eggs and sugar in heavy large saucepan; add butter. Whisk over medium-low heat until butter melts. Stir until filling thickens, about 10 minutes (do not boil). Transfer to another bowl, press plastic wrap onto surface and chill until firm, at least 4 hours.
Preheat oven to 350°F with rack in middle.
Roll out dough into a on a floured surface with a floured rolling pin. Cut out 24 (2,5-inch) rounds and fit each round into a tartlet pan (don't trim). Prick bottoms all over with a fork and bake 15 minutes.
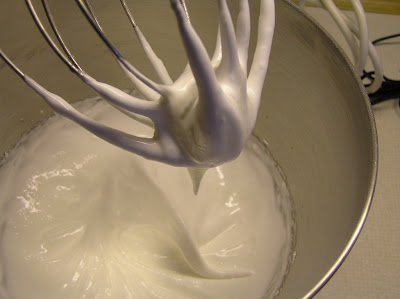
While the crust is baking, prepare meringue. Using electric mixer, beat egg white until soft peaks form. Gradually add sugar, beating until meringue is stiff and shiny. Spoon into pastry bag and pipe small disks the size of the tartlets on a sheet of parchment.
Reduce the oven temperature to 300°F, and bake meringue until pale golden, about 25 minutes. Cool on sheet.
Spread curd in crust, and place meringue atop tart. Chill until serving.
Tartelettes aux abricots passionnément chocolat
Recette de Pierre HerméPour 24 TartelettesPour la pâte sucrée (pour 3 fonds de tarte) :
285g de beurre à température ambiante
150g de sucre glace
50g d’amande en poudre
½ cuillère à café de fleur de sel
¼ de gousse de vanille
2 œufs
500g de farine
Pour les fonds de tartelettes :
10 gros abricots coupés en dés
3 cuillères à soupe de citron
1 pincée de poivre noir
Pour la ganache :
180g de chocolat
90g de crème liquide
75g de jus de fruit de la passion
45g de beurre.
Faites la pâte sucrée. Battez rapidement le beurre dans le bol d’un robot mixeur, de manière à obtenir un mélange crémeux. Ajoutez le sucre glace, la poudre d’amande, le sel et les graines de vanille. Mélangez et raclez les parois du bol avec une spatule si besoin. Le mélange doit être homogène. Ajoutez les œufs, mélangez. Versez la farine dans le bol, et mélangez quelques secondes, le temps de former une pâte grumeleuse. Il ne faut pas trop travailler la pâte. Fraisez (c’est l’action de travailler avec la paume de la main) rapidement et formez 3 boules de pâtes. Aplatissez et enveloppez-les dans un film plastique pour reposer au frais pendant au moins 4 heures. Vous n’utiliserez qu’un des trois disques. Vous pouvez conserver les autres au congélateur pendant 2 mois en vue d’une prochaine utilisation…
Après le temps de repos, préchauffez le four à 175°. Beurrez et farinez vos moules à tartelettes.
Farinez abondamment le plan de travail ainsi que le rouleau à pâtisserie, puis étalez la pâte sur 2 à 3 mm d'épaisseur.
A l’aide d’un emporte-pièce de 6 cm de diamètre ou d’un verre d’un diamètre légèrement supérieur à vos moules, découpez des disques dans la pâte. Foncez les moules avec ces disques et mettez à cuire 15 minutes.
Pendant ce temps, mettez les dés d’abricots à macérer dans un bol avec le jus de citron et le poivre.
Préparez la ganache. Dans une casserole à fond épais, portez la crème à ébullition sur feu moyen. Dans une autre casserole, portez le concentré de fruit de la passion à ébullition.
Dans un grand saladier, versez la moitié de la crème sur le chocolat en morceaux. Vous devez mélanger à la maryse, en formant des grands cercles, de manière à incorporer le chocolat à la crème. Versez ensuite le reste de la crème, toujours en remuant, puis le jus de fruit. Vous allez obtenir un mélange lisse et brillant. Incorporez alors le beurre pommade en petits morceaux. Laissez refroidir.
Réservez 24 dés d’abricots pour la décoration.
Répartissez le reste dans le fond des tartelettes. Déposez ensuite la ganache avec une poche à douille, et décorez d’un dé d’abricot par tartelette.
Servez à température ambiante.
Tartelettes meringuées au fruit de la passion
Adapté de Bon AppetitPour 24 tartelettesUn disque de pâte sucrée
(cf. recette ci-dessus)12,5 cl de jus de fruit de la passion
4 jaunes d’œufs
1 œuf
35g de sucre
40g de beurre
1 blanc d’œuf
45g de sucre
Mélangez le jus de fruit de la passion, les œufs et le sucre dans une grande casserole à fond épais. Ajoutez alors le beurre coupé en petits morceaux. Mettez la casserole sur feu moyen et faites épaissir le mélange en remuant constamment (environ 10 minutes, attention, la crème ne doit pas bouillir). Transférez dans un bol, couvrez d’un morceau de plastique et laissez au froid au moins 4 heures, pour que la crème soit ferme.
Préchauffez le four à 175°. Beurrez et farinez vos moules à tartelettes.
Farinez abondamment le plan de travail ainsi que le rouleau à pâtisserie, puis étalez la pâte sur 2 à 3 mm d'épaisseur.
A l’aide d’un emporte-pièce de 6 cm de diamètre ou d’un verre d’un diamètre légèrement supérieur à vos moules, découpez des disques dans la pâte. Foncez les moules avec ces disques et mettez à cuire 15 minutes.
Pendant que les fonds de tartelettes cuisent, préparez la meringue. Avec un fouet électrique, ou dans le bol d’un robot, battez le blanc d’œufs en neige. Ajoutez progressivement le sucre tout en continuant de battre jusqu’à ce que la meringue soit ferme et d’un blanc luisant.
Couvrez votre plaque à pâtisserie d’une feuille de papier sulfurisé. A l’aide d’une poche à douille, formez 24 disques de meringue de la taille de vos tartelettes.
Réduisez la température du four à 150° et faites cuire les meringues environ 25 minutes. Laissez refroidir.
Vous pouvez ensuite garnir le fond des tartelettes avec la crème de fruit de la passion, et recouvrir avec les meringues.
Réservez au frais jusqu’au moment de servir.