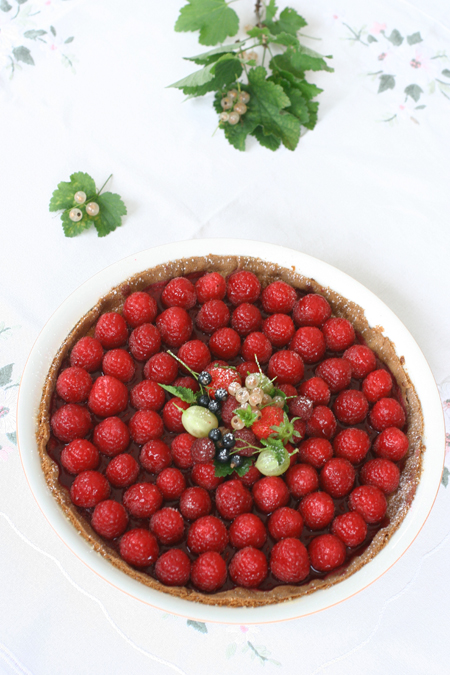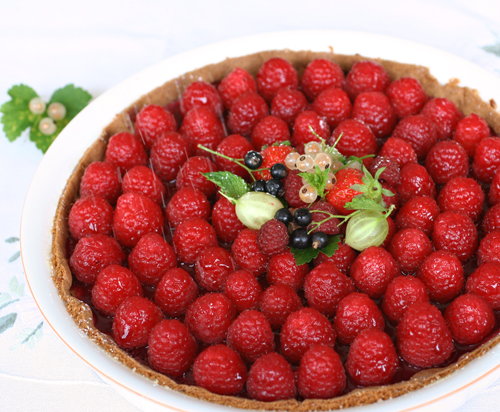
One year! and a Raspberry tart to celebrate
By Mélanie, on Saturday, July 25, 2009
One year ago, I started this blog. Like for a baby, this first year was mainly about learning. I needed understand about how to write, about the importance of plating and composing, about CSS (still not great!!), etc...
Even though I have still so much room to improve, I feel there has been some progress. I have enrolled in photoshop classes. I've discovered RSS feeds. I now know how to change the blog layout. I pay much more attention to the light in my photography. I've become familiar with new cooking techniques. I've even sewed a tablecloth (and learned how not to show the twisted hem in picture ;-)I am happy I had the occasion to learn all of this. And I'm very excited about the future steps! One of them is the blog remodeling, and I wished I had finished it today. I did try, but, boy, am I slow when it comes to "!-- #.a hover@ dd: exp }". Do this looks like swears words to you too?
However, I have one big news. I'm glad to announce that this blog is going to have a baby sister. It's due for this summer. I'm still thinking about names... There's going to be much less talking. No food. But a lot more to see. Can't wait!For this occasion, I want to share with you a special treat, the quintessence of this blog. It represents everything I love in a dessert. It's not too sweet, got plenty of fruits in it, their flavors brightened up by the almonds. This simple tart captures the summer mood.
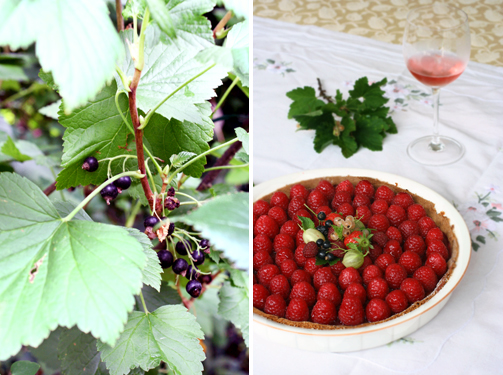
The gorgeous raspberries are so fresh that it feels like sunshine in your mouth. Their acidity is partialy offset by the rich almond cream, which is layered over a sablée crust. Now do you really wonder why this has always been one of my favorite dessert? I thought I was the only one, but the number of "second"-servings proves me wrong! Although you can find it in almost any bakery in France, I had never prepared one myself. What a better time than a first year anniversary for this?
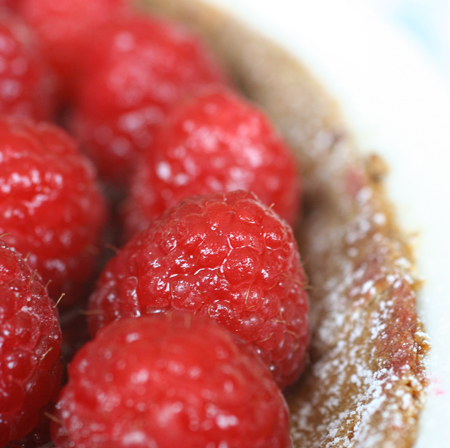
Almond and Raspberry Tart
1 sablée tart shell
2/3 stick butter
1/2 cup almond flour
1/2 cup sugar
2 eggs
12 oz. raspberries
6 oz. mixed berries (whatever you have)
5 teaspoons sugar
1/2 sheet (1/2 teaspoon) gelatin
For the sablée tart shell, you can use one of these recipe :
- From J. Robuchon, my favorite, the one that has been used in my family for years. It's a little bit more difficult, sticky and has to be rolled thinly (because there is not so much dough). However, once you'll taste it, you'll forget the difficulties.
- From S. Glacier, easier, and tasty enough to compete with the one from Joel Robuchon. But be careful, there's a lot of dough, so it will be enough for a tart + 1 or 2 tartlets.
- The sugar pie crust from P. Hermé. Yields 3 tart shells, so you can freeze 2 and have it ready for another time.
Preheat oven to 350°F with rack in middle.
Roll out dough on a lightly floured surface with a floured rolling pin into a 12-inch round.
Slide bottom of tart pan (separate from rim) under dough and set into rim of tart pan. Cut off excess dough, leaving 1/2-inch overhang, and fold overhang inward. Press dough against side of pan, pushing dough 1/4 inch above rim. Lightly prick bottom of shell all over with a fork and chill until firm, 10 to 15 minutes.
Bake until side is set and edge is pale golden, about 12 minutes.
During that time, prepare the almond cream. Mix together sugar, almond flour and butter. Beat in the eggs.
Pour into the par-baked shell and bake 20 more minutes.
Let cool.
Arrange raspberries over the cooled pie.
In a small bowl, sprinkle the gelatin over the water, and let it sit.
Put remaining berries and sugar in a small saucepan over medium heat until cooked (about 5 minutes). Puree with a fork or in your blender. Pass through a sieve to keep only the juice and mix with gelatin while it's still warm.
Pour over the raspberry tart.
You can decorate with confectioner sugar and mixed berries.
Tarte amandine aux framboises
1 fond de tarte en pâte sablée
70g de beurre à température ambiante
110g de poudre d'amande
90g de sucre
2 oeufs
350g de framboises
170g de fruits rouges (framboises et/ou cassis, groseilles...)
20g de sucre
1/2 feuille de gélatine
Pour la pâte sablée, vous pouvez utiliser une des trois recettes suivantes
- Celle de J. Robuchon, ma préférée, mais la plus difficile à travailler. Elle est fragile et la quantité correspond à un fond de tarte de 24cm, il faut donc l'étaler finement (donc plus de risques de la casser). Ces difficultés sont vite oubliées dès qu'on la goûte.
- Celle de S. Glacier, que j'utilise aussi depuis un an. Elle est tout de même assez bonne pour faire de la concurrence à celle de Joel Robuchon! La quantité n'est pas très pratique, elle correspond à 1 tarte + 1 ou 2 tartelettes...
- Celle de P. Hermé. Il s'agit en fait d'une pâte sucrée. L'avantage est qu'elle correspond à 3 fonds de tarte, vous pouvez donc en congeler 2 et les avoir prêts pour un autre jour.
Préchauffez le four à 180°.
Etalez le disque de pâte en un cercle légèrement plus grand que votre moule à tarte, sur une épaisseur de 2-3 mm. Garnissez votre moule (beurré et fariné) avec la pâte et faites la pré-cuire 12 minutes au four.
Pendant ce temps, préparez la crème amandine :
Dans le bol de votre robot, mélangez le sucre et la poudre d'amande, puis le beurre en morceaux. Incorporez ensuite les oeufs.
Versez l'appareil sur le fond de tarte pré-cuit et enfournez pour 20 minutes.
Laissez refroidir à température ambiante.
Disposez les 350g de framboises sur la tarte.
Faites tremper la demi-feuille de gélatine dans de l'eau froide.
Dans une petite casserole, faites chauffer à feu moyen les fruits rouges avec le sucre pendant environ 5 minutes. Ecrasez-les avec une fourchette ou dans un hachoir, et passez-les à travers un chinois pour ne garder que le jus.
Mélangez le jus avec la gélatine essorée, et versez ce coulis sur les framboises.
Décorez avec du sucre glace et des fruits rouges.
La suite, please
About Nutella, or how to be deified by chocolate addicts
By Mélanie, on Tuesday, December 9, 2008
1 disk of sugar dough for the tart shell (here or there)
7 oz. nutella
5 oz. bittersweet chocolate
1 cup (2 sticks) butter
1 egg
3 yolks
2 Tbsp sugar
5 oz. Coarsely chopped hazelnuts
Preheat oven to 350°F.
Roll the disk of dough into an 12-inch circle, 1/4-inch thick, on a lightly floured surface. Line a 10-inch pie pan, leaving a 1-inch overhang.
Line shell with foil and fill with pie weights. Bake until edge is pale golden, about 12 minutes.
Spread nutella over bottom of the tart shell.
Stir chocolate and butter in heavy medium saucepan over low heat until melted and smooth. Remove from heat. Cool to lukewarm, stirring often. Stir the egg and yolks one into melted chocolate, one at a time. Whisk slowly, starting at the center and slowly working your way out in concentric circles until you have a smooth, shiny mixture. Finally incorporate sugar.
Pour filling into cooled crust, over the nutella. Sprinkle with chopped hazelnuts and bake until filling is set about 3 inches from edge but center is still wobbly, 11 minutes at 360°F. (Center will continue to set as tart cools.) Partly cool in pan on rack, about 30 minutes, before serving. This is also very good at room temperature.
Tarte au Nutella
De Pierre Hermé
1 fond de tarte sucrée (ici ou là)
200g de nutella
140g de chocolat noir
200g de beurre
1 œuf
3 jaunes
2 cuillères à soupe de sucre
140g de noisettes grossièrement hachées
Farinez abondamment le plan de travail ainsi que le rouleau à pâtisserie, puis étalez la pâte sur 2 à 3 mm d'épaisseur.
Etalez le disque de pâte en un cercle légèrement plus grand que votre moule à tarte (la recette a été réalisée avec un moule de 27cm). Foncez votre moule (beurré et fariné) avec la pâte et faites la précuire 12 minutes au four.
Tartinez le fond de la tarte avec le nutella. Réservez au frais.
Faites fondre le chocolat avec le beurre. Laissez refroidir légèrement (jusqu’à environ 40°). Incorporez délicatement l’œuf au chocolat. Utilisez une maryse pour éviter d’incorporer de l’air dans la ganache. Incorporez ensuite les jaunes un à un, puis le sucre.
Faites cuire la tarte 11 minutes à 190°, juste assez pour que les bords soient fermes et le centre encore tremblotant.
Laissez refroidir dans le moule, environ 30 minutes, et servez tiède ou à température ambiante.
Baking, anywhere
By Mélanie, on Saturday, August 16, 2008
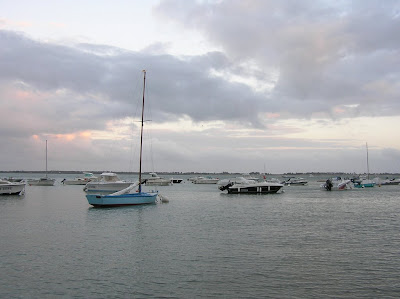
I left without even saying goodbye. I went far, far away, to a deserted island. Well, ok, maybe this is quite exaggerated. But this was one week without turning the TV or the computer on. One week in a nice old house, with six other young people (what, you have some doubts? we are young! It’s just a matter of reference anyway…), and close to the beach. And yes, I was able to wear my bathing suit for the first time in the last 18 months!!
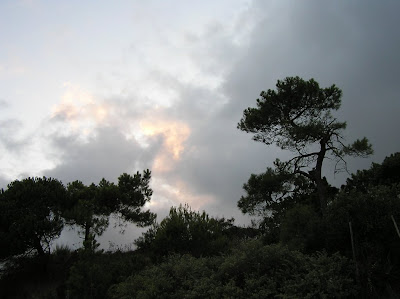
Alas, some clouds just seem to ignore the concept of microclimate. This was not really a problem, and I traded the bathing suit for a more usual accessory, the apron!
Before leaving, I knew that I would maybe have the opportunity to bake something. A dessert is always enjoyed! (what I did not know, though, is that everybody would want to cook, so if you’re reading this, thank you guys for all the good meals we shared together).
I did not want to travel with my cookbooks (although it would have been a nice practice for the Olympics) and very strangely, it seems that I’m unable of remembering any recipe. Maybe it’s because I always want to try something new. This is a familiar syndrome for the food blogger we are. I know, what’s the point of finding a good recipe if you won’t make it again?? But that would mean not listening to the tiny voice suggesting that, maybe, the next recipe will be even better… And what would this blog become if I did not listen to her?!?
I restricted the recipes to ONE piece of paper, with everything vital (am I exaggerating again?) for baking. The pâte sucrée (sugar dough) and choux pastry from Alain Ducasse, the cream pastry and mascarpone mousse from Pierre Hermé, the almond cream from Eric Kayser, the fruit mousse from … . I was ready to go! Tell me what you want, and I’ll do it!
We had some peaches and vanilla ice cream? A sablé Breton is the answer!
Feel like lemon curd? What about a lemon and strawberries pie?
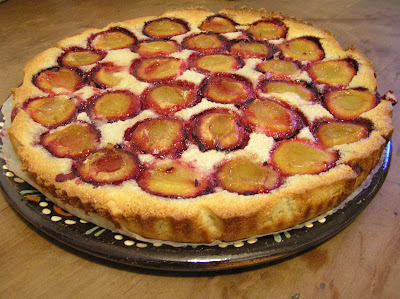
But the most successful was the almond and plum tart. Did I tell you I love almonds? I LOVE almonds. Shredded in salads. Whole with swiss chards. Ground in pie dough. As marzipan in... anything! (it tastes good in chocolate bonbons, for a cake’s decoration or inside the cake...). I think you’ve got the point...
I also like to use fruits usually a bit tart for desserts. I think it brings the best out of them. Sweet fruits, like nectarine or strawberries, are just so good on their own. Of course they are good in a pie too, but it does not titillate your palate the way that raspberries, rhubarb or baked apricots do... You know, that contrast between the fruit and the sweet pie crust / crumble / meringue (or anything you want).
So I know this is a basic pie, nothing new to discover. But sometimes you just need a quick and simple recipe. And I like it a lot (did I mention there’s almond in it??). Plus, it’s the kind of pie that brings guys to ask you if you’re single. Do I need to say more?
Plum and almond tart
For the sugar dough
1 ½ stick of butter, at room temperature
1 egg
½ cup sugar
1/8 cup almond power
2 cups flour
For the almond cream
1 ¼ cup granulated sugar
3 eggs
½ cup almond powder
½ cup whipping cream
1/8 cup + 2 tsp butter
About 2 pounds quetsche plums
Prepare the pie dough :
First cream the butter with the egg in your mixer, before adding the sugar, almond powder and flour to obtain a compact dough. Form a ball with the dough and flatten into a disk. Wrap in plastic wrap and refrigerate at least 30 minutes and up to 2 days.
For the almond cream :
In the large bowl of your food processor, beat at high speed the eggs with the sugar until creamy. Add the almond powder and the whipping cream, and pulse until incorporated. Melt the butter and pour it on the mixture while beating.
Preheat oven to 340°F.
Roll the disk of dough into an 12-inch circle, 1/4-inch thick, on a lightly floured surface. Line a 10-inch pie pan, leaving a 1-inch overhang.
Line shell with foil and fill with pie weights. Bake until edge is pale golden, about 10 minutes.
While crust bakes, divide the plums in two and remove the pit.
Once the crust is baked, pour almond filling over the tart shell and arrange plums over it. Put pan on a baking sheet and bake until crust and filling are golden and plums are tender, 30 to 40 minutes. Cool tart completely in pan on a rack before unmolding. Just before serving, dust with confectioners sugar.
Tarte amandine aux quetsches
Pour la pâte sucrée
250g de farine
150g de beurre à température ambiante
100g de sucre
30g de poudre d’amande
1 œuf
Pour la crème d’amandes
100g de poudre d’amandes
10cl de crème liquide
3 œufs
240g de sucre
40g de beurre
1kg de quetsches
Préparez la pâte à tarte :
Mettez d'abord le beurre avec l'œuf dans le bol de votre robot mixer. Malaxer quelques instants, avant d'ajouter le sucre, la poudre d'amande et la farine pour obtenir une pâte homogène. Formez une boule avec la pâte et aplatissez-la avec la paume de la main. Enveloppez la dans le plastique et laissez reposer au réfrigérateur pendant au moins 30 minutes et jusqu'à 2 jours.
Pour la crème amandine :
Dans le bol de votre robot, battez les œufs avec le sucre jusqu'à ce que le mélange devienne crémeux. Incorporez la poudre d'amande et la crème liquide, puis le beurre préalablement fondu.
Préchauffez le four à 170°.
Etalez le disque de pâte en un cercle légèrement plus grand que votre moule à tarte (la recette a été faite avec un moule de 27cm). Garnissez votre moule (beurré et fariné) avec la pâte et faites la précuire 10 minutes au four.
Pendant ce temps, divisez les prunes dans deux et enlevez les noyaux.
Une fois que la pâte est cuite, versez la crème d’amande et disposez les prunes, coté bombé en dessous. Faites cuire au four jusqu'à ce que la tarte soit dorée, 30 à 40 minutes. Laissez refroidir et saupoudrez de sucre glace avant de la servir.
Where it all began... The Omiarie
By Mélanie, on Friday, July 25, 2008
Well, when I discovered some blogs last year, I started to read them. Like, everyday. And I realized just how much you could share with others. And so, before I could notice, I found myself imagining what I could say about this last recipe I was trying. Or sharing this great trick I just learned. And, as my desire for this blog grew bigger, I just had to overcome my doubts (ok, my fears). About my writing. About my English level. And about my technical abilities. Or, should I say, inabilities… And I’m going to give it a try.
I’m just wondering why I don’t bake this more often… And actually, someone just gave me this great baking form, which is the best for this type of cake. Mmmm [intense thought]. Would be a shame not to use it ;-)
Oh, by the way, I wanted to write this blog in English, even though I know I’m going to make some grammatical errors, because some of the people I care a lot about do not read French. However, the recipes are sometimes more technical, so after the English version (with the cup system) you’ll find one in French (in grams).
Omiarie
For 16 people
I think it’s more intended for a sweet afternoon break, but it’s moist and complex enough so you could serve it as a dessert. And if you’ve got some leftovers (even better if a little dry), it will taste like heaven dunked in your morning coffee.
For the batter :
2 ¼ sticks butter
1 ½ cups sugar
2 to 3 eggs
1 teaspoon of vanilla extract
2 ¾ cups flour
2 tsp baking powder
7/8 cup whipping cream
For the hazelnut-cinnamon filling:
2/3 cup brown sugar
1 ¼ cups hazelnut powder
1 tsp cinnamon
1/3 cup almond paste or marzipan (if you can, buy the one with 50% almond, and not only 33%)
For the chocolate glaze (optional):
2/3 cup dark chocolate
In the large bowl of an electric mixer fitted with paddle attachment, cream butter and sugar until light and fluffy, about 2 minutes. Add the eggs, one at a time, mixing well after each addition. Mix in the vanilla extract.
In a separate bowl, sift together flour and baking powder. With the mixer on low speed, add the flour to the batter. Use a rubber spatula to scrape down the sides of the bowl if needed.
Add the whipping cream, gradually increasing speed of the mixer as the liquid combines with the preparation. Beat at high speed for 5 minutes, the volume of the batter should increase.
In another bowl, combine brown sugar, hazelnut powder and cinnamon. Coarsely crumble the marzipan (it will be less sticky if you roll it in the hazelnut mixture while breaking it in small bits). Whisk well.
Preheat oven to 360°F.
Generously coat a bundt pan, preferably nonstick, with butter (or margarine). If you don't have any bundt pan, you could use 2 small loaf pan, or one angel food cake pan.
Pour one third of the batter into the prepared bundt pan. Sprinkle half of the hazelnut mixture, then another third of the batter, the rest of the hazelnut and finish with the batter. Gently swirl a fork through the batter in a up and down pattern in order to marble the cake.
Bake until tester inserted into center comes out with some moist crumbs still attached, about 1 hour. Cool cake in pan at least 30 minutes before inverting onto a rack to cool completely.
If you want to glaze the cake with chocolate, let cake stand at room temperature overnight. This way, the crust will be crunchier, in contrast to the chocolate.
Melt the chocolate (with 1 teaspoon water) in the microwave at lowest. Using a cooking brush, spread the glaze on the cake. Let cool 30 minutes before serving.
Bon appetit!
Omiarie
Pour la pâte:
250 g de beurre
1 paquet de sucre vanillé
300 g de sucre
2 - 3 œufs
350 g de farine
2 c. à café de levure
20 cl de crème liquide
Pour la garniture aux noisettes :
150 g de sucre brun
125 g de noisettes en poudre
1 c. à café de cannelle
30 g de pâte d'amande
Pour le glaçage au chocolat (optionnel) :
75g de chocolat noir, si possible de couverture
Dans le bol d’un mixer électrique, battez le beurre et les sucres jusqu’à obtention d’un mélange crémeux (environ 2 minutes). Ajoutez les oeufs un à un, en mélangeant bien après chaque pour bien les incorporer.
Mélangez la farine et la levure, et ajoutez les doucement à la préparation précédente, avec le mixer en position lente. Utilisez une spatule pour nettoyer les bords du bol si nécessaire.
Ajoutez la crème liquide en augmentant graduellement la vitesse du mixer. Laissez le batteur sur vitesse maximale pendant au moins 5 minutes, la préparation doit augmenter de volume.
Dans un autre bol, combinez le sucre brun, la poudre de noisette, la cannelle et la pâte d’amande grossièrement émiettée (elle collera moins si roulée dans la noisette lors de l’émiettement). Vous pouvez également la congeler de manière à la râper facilement.
Préchauffez le four à 180°.
Préparer le moule en le beurrant et farinant. Si vous n’avez pas de moule à Kougelhopf, vous pouvez utiliser un grand moule à cake (ou 2 petits, en réduisant le temps de cuisson).
Versez un tiers de la pâte dans le moule. Soupoudrez de la moitié de la garniture aux noisettes, puis d’un deuxième tiers de pâte, du reste de noisette et de pâte.
Pour marbrer le gâteau, mélangez délicatement à l’aide d’une fourchette, en faisant des vagues de bas en haut.
Enfournez pour environ 1 heure. La lame du couteau doit ressortir du gâteau avec quelques miettes dessus. Le gâteau doit rester moelleux. Laissez refroidir au moins 30 minutes avant de démouler et de laisser refroidir complètement.
Si vous voulez ajouter le glaçage au chocolat, c’est encore meilleur si l’omiarie est resté à l’air libre pendant plusieurs heures, de manière à former une croûte croustillante.
Faites alors fondre le chocolat au bain marie ou au micro-onde (dans ce cas, ajoutez une cuillère à soupe d’eau et utilisez la puissance minimale). Utilisez un pinceau pour répartir le chocolat sur le gâteau. Laissez le chocolat durcir avant de servir.
La suite, please