Showing posts with label Very Easy. Show all posts

Mint & Strawberries in the simplest apparel

By Mélanie, on Tuesday, August 4, 2009

fraises3


This second recipe is a little late for the summer fest week. We're now talking about stone fruits, so I'm off subject here. But maybe you have a prolific mint like me & my mother do. Or maybe you bought a bunch for a recipe and you're left with a handful of leaves, no knowing what to do next. Well, here I am with the solution!
Ain't I nice?

pâte sucrée
you'd better say yes, have you seen this rolling pin?

This recipe is, once again, very simple to assemble. This is all about summer, and the last thing we want is to spend a whole sunny day inside, cooking... It's time to rest, to go to the beach or to discover the parks of your city. It's also time to enjoy the bright simplicity of fruits. Just a sablée crust and mint will make the sweet flavors of ripe strawberries stand out. There's no need for cream. No, I said no pastry cream. No whipped cream. Don't insist. I had doubts too. Then I tasted it. No doubts anymore. You can do it.

fraises2


About the tart crust : this is the fourth recipe on my blog. Whatever the recipe, please make it yourself and don't use a store-bought one. It's really easy, there's no reason to be afraid. Don't hesitate to put a lot of flour on your kitchen counter before rolling it. And if it breaks, it ok, just press it together in your pie form. There is NO comparaison between a store-bought crust and a homemade...

fraise1


Strawberry and mint tart

For the sugar crust
1 egg
1/3 cup + 1 Tbsp sugar
1 1/2 cup flour
1 stick butter
1 pinch salt

For the tart
1 1/2 pound strawberries
15 mint leaves
2 Tbsp currant jelly

First mix sugar, flour, salt and the butter for a few seconds. Mix in the egg and, with your hand palm, press the dough about 3 times, just until it forms a ball that holds together. Flatten into a disk and wrap in plastic wrap and refrigerate at least 1 hour and up to 1 day.
Preheat oven to 340°F.
Roll out dough into a on a floured surface with a floured rolling pin. Delicately fold the rolled dough in 4, to lift it easily, and unfold in the tart form. Prick bottoms all over with a fork and bake 15 minutes.

Once the crust cooled, arrange diced strawberries on top, in a concentric form.
In a small saucepan, heat the jelly with 1 Tbps water until liquid. Brush the strawberries with the jelly.
Slice thinly the mint leaves, and sprinkle over the pie.


Tarte aux fraises et à la menthe

Pour la pâte sucrée
1 oeuf
100g de beurre
200g de farine
80g de sucre
1 pincée de sel

Pour la tarte
700g de fraises
2 cuillères à soupe de gelée de groseilles
une quinzaine de feuilles de menthe

Mélangez quelques secondes le sucre, la farine, le sel et le beurre, le temps de former une pâte grumeleuse. Incorporez l'œuf. Fraisez (c’est l’action de travailler avec la paume de la main) rapidement et formez 1 boule de pâte. Aplatissez et enveloppez ce disque dans un film plastique pour reposer au frais pendant au moins 1 heures.
Préchauffez le four à 170°.
Farinez abondamment le plan de travail ainsi que le rouleau à pâtisserie, puis étalez la pâte sur 2 à 3 mm d'épaisseur. Pliez délicatement la pate en 4 pour la soulever plus facilement et depliez là dans le moule à tarte. Mettez à cuire 15 minutes.

Une fois le fond de tarte refroidi, arrangez les fraises coupées en lamelles de manière concentrique.
Dans une petite casserole, faites fondre la gelée avec un peu d'eau, et appliquez ce nappage sur les fraises.
Emincez finement la menthe, et disposez la sur la tarte.


La suite, please

Last call for summer fest

By Mélanie, on Monday, August 3, 2009

tastespotting

You know this feeling, when you're rushing through the airport, running and hoping you'll get in time before the plane takes off? The adrenaline is pumping, but deep down you know that you can make it, that, no matter how tired you are, it's going to be alright. You won't give up.
Well, that exactly how I feel right now. It's 2 a.m. in Paris and I want to post this recipe before the end of the day (US time. no, it's not cheating). To my regret, I have not participated to a lot of blog events (one, actually), but when I saw that Todd and Diane, of White on Rice Couple, collaborated to the Summer Fest 2009, I knew I wanted to be part of this.

geranium petit

This event is "a four-week celebration of fresh-from-the-garden food: recipes, growing tips, even tricks for storing and preserving summer’s best". Some people may think that they are not concerned because they live in an apartment. But if you have even a windowsill, you can have some fresh aromatic herbs at home.

web1

Because I grew up in a house with a garden, filled with stone fruits trees (apricots, peaches, cherries), berries, tomatoes, zucchini, and herbs (and LOTS of flowers...), this is something I really missed when moving to Paris.
Fortunately, I have now a balcony, and my first plantation was for a little corner of kitchen delights : rosemary, thyme, basil, etc...

thyme

But the easiest herb to grow is mint. It's almost like weeds, appearing in every corner of my jardinière. If you don't want this, you should plant it in a separate part. I don't mind though, because i really enjoy its fresh and peppery flavor during the summer. It will make a huge difference in a simple fruit salad, but really, when it's hot outside, you can just add it to anything!
I'm going to post a few (and sooo easy) recipes with mint to give you some ideas... There was the strawberry and watermelon smoothie.
This is a chilled cucumber soup, perfect as an appetizer, with some friends on a warm evening.

web3


Chilled mint and cucumber soup with shrimps
For 4 appetizers

1 large cucumber
1 yogurt or 1/2 cup buttermilk
10 mint leaves, washed
1 teaspoon salt
12 shrimps, cooked

In a blender purée cucumber and mint with buttermilk and salt until smooth (I start with one third of the cucumber and all the buttermilk, and then I add gradually the rest, so that the cucumber doesn't get stuck in my blender). Keep in refrigerator. Before serving, add 3 shrimps in each bowl.
Served chilled.

Soupe froide de concombre à la menthe
Pour 4 entrées

1 concombre
1 yaourt brassé
10 feuilles de menthe, lavées
1 large pincée de sel
12 crevettes cuites

Réduisez le concombre, la menthe, le sel et le yaourt en purée dans votre blender / mixeur (je commencer toujours par hacher 1/3 du concombre avant d'ajouter le reste, sinon tout se coince entre les lames du robot). Gardez au réfrigerateur.
Avant de servir, ajoutez 3 crevettes dans chaque bol.
Servez bien froid.

La suite, please

A strawberry watermelon smoothie for a sunday afternoon

By Mélanie, on Saturday, June 13, 2009

smoothie site 2

Tomorrow it's gonna be Sunday. It's going to be a sunny and warm day. Imagine yourself enjoying the nice weather outside. Maybe even having a barbecue, gardening, or just relaxing. You know what would make this day even more perfect? The vibrant taste of strawberries, yes. But, most of all, in the form of a cold and refreshing drink!
So please, go put one yogurt in the freezer now. That's it. Tomorrow, all you'll have to do is to add a handful of strawberries, a piece of watermelon, and some mint leaves to brighten up the flavours. And enjoy!

smoothie site1


Strawberry Watermelon Smoothie

1 yogurt (fat free)
A dozain strawberries
2 oz. watermelon (without the skin)
4 mint leaves

The day before, put the yogurt in the freezer.

Cut the fruits in large cubes, put in the blender with the frozen yogurt and mint. Blend. Serve. Enjoy!

Smoothie aux fraises et à la pastèque

1 yaourt nature (0% par exemple)
Une douzaine de fraises
1 morceau de pastèque (environ 60g sans la peau)
4 feuilles de menthe

La veille, mettez le yaourt au congélateur.

Coupez les fruits en large morceaux, placez les avec le yaourt (brisé en morceaux) et la menthe dans le mixeur. Mexez. Servez. Et appreciez! :)
La suite, please

Picnic in the train...

By Mélanie, on Thursday, April 30, 2009

leek tart

Revelation : this blog is not only about baking, but also about cooking. If you look at my recipe list, you couldn't guess, right? ;-)
Well, here's the thing : I've got this stupid fear of disappointing you with a savoury recipe. I don't do anything very elaborate, so why would you care? And let's be honest : I find it much more difficult to make a salad look appetizing than some, hum, let's say, raspberry pie... I'm sure you agree, non?

poireaux

So actually, I had planned to share my first cupcakes today. But then, I did the frosting in the morning, before leaving for work, and did not note the quantities. I need to check that before telling something awfully wrong...
What a better opportunity to finally open my savoury folder, just waiting to be shared?

This leek tart is quite rustic. Simple to make and comforting. Served warm with some salad, it's a delicious dinner. But because of the cream cheese in the custard, it holds together very well, which makes it perfect for transportation. You'll enjoy it cold, for lunch, or with your friends in the train on a week-end trip. Isn't it picnic time soon??

The recipe is very straightforward : start with a simple pie dough. Cut, clean and blanch the leeks. For the custard, take the best of a quiche and of a cheesecake, beating the eggs with a little cream cheese. Don't forget to add the deep flavour of grated nutmeg. Put in your oven, it's gonna be ready soon.


P1010576


Pie dough
2/3 cup butter
3 Tbsp cold water
1 egg yolk
2 cups flour
1 Tbsp salt

Stir together the flour and salt with a fork to blend. Make a well in the centre, and add the fat and the yolk. Blend into the flour using your fingers.
Drizzle a few tablespoons of the ice water over the surface of the flour mixture and quickly rub the water into the flour. Continue to add the water, a tablespoon or so at a time, just until it holds together.
Gather and press the dough into a ball, wrap well, and let chill in the refrigerator for at least 1 hour.

Unwrap the dough, place it on a floured work surface, and scatter a little flour over the top. Roll out the dough into an even round about 1/8 inch thick.
Fold the dough in half or roll it loosely around the rolling pin, and gently lift and position it over the pan. Unfold or unroll and ease the dough into the pan without stretching, making sure that the pan sides and the rim are evenly covered. Press the dough gently against the sides and bottom. Trim the overhang to 1 inch. Tuck the dough overhang under itself and flute the edges.
Prick the pastry all over with the tines of a fork. Bake it 15 minutes. Remove from the oven and reserve.

Rustic leeks tart
1 pie dough, pre-baked
3 medium leeks
3 eggs
4 oz. cream cheese
7 Tbsp half and half (or 4 Tbsp cream and 3 Tbsp milk)
1/2 tsp grated nutmeg
1 tsp salt
(1/4 tsp pepper)

Preheat oven to 375°F.

Prepare the leeks : Keep only the white and pale green parts and slice. Place the leek slices into a bowl filled with cold water. Swish the pieces of leek around in the bowl of water with your hands. Rub the leek pieces to remove any sand and dirt that may be on the slices, and strain.
Blanch in boiling water during 2 minutes, then strain and dry the slices on paper towels.

In a medium-sized bowl whisk together the eggs and the cream cheese until they are broken up, then whisk in the milk and the cream. Season with salt, nutmeg and pepper.

Arrange the leeks evenly over the pastry. Pour the custard mixture over it. Place the tart on a baking sheet and bake it in the middle of the oven until the top is golden and puffed and the custard is cooked through, about 40 minutes.
Remove from the oven and let cool 10 minutes before serving. You can also eat it at room temperature.


Pâte brisée
250g de farine
5g de sel
125g de beurre ramolli
1 jaune d'oeuf
5cl d'eau froide

Versez la farine et le sel dans un bol. Faites un puit au milieu duquel vous mettrez le beurre et le jaune d'oeuf. Incorporez tous les éléments du bout des doigts. Ajoutez l'eau au fur et à mesure jusqu'à obtenir une pâte homogène.
Formez une boule avec la pâte, aplatissez-la et enveloppez-la dans un film plastique pour reposer au frais pendant au moins 1 heure.

Après le temps de repos, préchauffez le four à 180°. Beurrez et farinez le moule à tarte.
Farinez abondamment le plan de travail ainsi que le rouleau à pâtisserie, puis étalez la pâte sur 2 à 3 mm d'épaisseur.
Foncez le moule avec ce disque, piquez le fond avec une fourchette. Faites cuire 15 minutes. Sortez du four et réservez pour la tarte.

Tarte rustique aux poireaux
1 fond de pâte brisée pré-cuit
3 poireaux de taille moyenne
3 oeufs
100g de fromage à tartiner (type St Moret)
10cl de crème liquide legère
10cl de lait (ecrémé ou demi-ecrémé)
1 demi cuillère à café de noix muscade moulue
1 cuillère à café de sel

Préchauffez le four à 180°.

Préparez les poireaux : enlevez les racines et les feuilles, ne gardant que 5cm de la partie verte.
Découpez les tiges en rondelles, et nettoyez les dans un grand bol d'eau froide. Laissez les tremper un moment pour que les impuretés tombent au fond, et égouttez les. Faites les blanchir (cuire 2 minutes dans une casserole d'eau bouillante).

Pendant ce temps, dans un bol, mélangez au fouet les 3 oeufs et le fromage à tartiner. Une fois que la préparation est homogène, incorporez la crème, le lait, la muscade et le sel.
Disposez les poireaux sur le fond de tarte pre-cuit, et versez l'appareil dessus. Faites cuire 40 minutes, jusqu'à ce que la tarte ait une jolie couleur dorée et soit légèrement gonflée.
Laissez refroidir 10 minutes avant de déguster.
La suite, please

Cake or bonbons, yours to choose

By Mélanie, on Monday, February 16, 2009

P1000733

Like for a lot of people, February seems to have won over me : after one week of fighting against the headache, I think a virus stoke back yesterday, when I didn't except it. I feel dizzy and my head is so heavy I wonder how it stands up on my neck, so no wonder my time out of the office is spent… in my bed, and not in the kitchen! However, since it’s already been one week, I thought I could make you wait with some chocolate.

P1000711

The recipe is quite basic, a one-bowl chocolate cake, and simply upgraded with some candied orange peels. It tastes like orangettes, but with the smooth texture of a chocolate fondant. Like a bonbon, worthwhile of a party, but less time consuming…
So, a quick note for a quick recipe, but this cake will quickly disappear too!


Orangette Chocolate cake

2 oz. candied orange peels
1 ½ stick butter
2/3 cup sugar
3 large eggs
5.5 oz. bittersweet chocolate
1/3 cup flour

Decoration (optional)
2 oz. bittersweet chocolate
1 oz. candied orange peels

Preheat oven to 375° F, and butter an 8-inch round cake pan.
Finely chop the candied orange peels.
Beat the butter with the orange until creamy, about 3 minutes. Add the sugar, then add the eggs one by one, stirring well after each addition.
Melt chocolate in a double boiler or in the microwave and add to the butter-egg mixture. Whisk well before adding the flour.
Pour batter into the buttered cake pan and bake for approximately 25 minutes, or until the center of the cake looks set and the top is crackled.
Let the cake cool in its pan on a rack for 10 minutes; then carefully turn the cake out of the pan and revert it, so that the crackly side is facing upward. Allow to cool completely. The cake will deflate slightly as it cools.

If you wish so, you can glaze the cake with melted chocolate and pieces of candied orange peels as in the picture.

Gâteau au chocolat façon orangette

50 g d’écorces d’oranges confites
150g de beurre à température ambiante
120g de sucre
3 œufs
150g de chocolat
40g de farine

Décoration (facultative)
50g de chocolat noir
25g d’écorces d’oranges confites

Préchauffez le four à 180°.
Hachez les écorces d’oranges.
Crémez le beurre avec les écorces d’orange en battant pendant plusieurs minutes. Ajoutez ensuite le sucre, puis les œufs, un à un, en battant après chaque addition.
Faites fondre le chocolat dans une casserole au bain marie, ou dans le micro-ondes (ajoutez 1 cuillère à soupe d’eau et faites fondre sur une puissance de 500W max).
Ajoutez le chocolat fondu et fouettez jusqu’à obtenir un mélange homogène, puis rajoutez la farine, sans trop mélanger cette fois.
Versez votre préparation dans un moule à manqué beurré et fariné, et faites cuire 25 minutes. Laissez refroidir avant de démouler.

Si vous le souhaitez, vous pouvez glacer le gâteau avec du chocolat fondu et le décorer de morceaux d’oranges confites.
Pour tempérer le chocolat simplement, je ne mets que la moitié du chocolat dans un bain marie. Dès que le chocolat est fondu (et donc à environ 55°), je le retire du feu, et je rajoute le reste des carrés. Il suffit de mélanger à la cuillère jusqu’à ce que tout soit fondu (ce rajout a fait baisser la température).


La suite, please

Quick raspberry trifle

By Mélanie, on Tuesday, February 3, 2009

Big confession : sometimes, I don't want to hear anything about food. I don't want to spend hours in the kitchen, whisking, mesuring, rolling (ok, that's pretty unusual. In a normal state of mind, this only evocation would look like fun to me!), cleaning the dishes (and that's the constant part...).
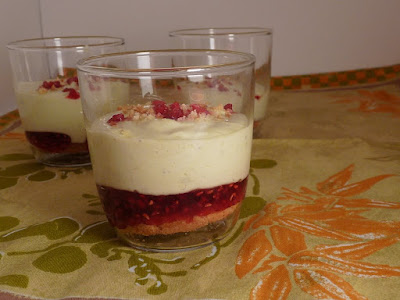
I was in this lazy mood last time I had friends over for dinner, but I still wanted to serve them something good and (at least partially) homemade. So I cheated, and used some store-bought cookies, and very common ingredients.
I've learned that that’s ok to keep it simple. Maybe you'll be lazy too, or in a hurry, and you’ll be glad to have this dessert ready in 10 minutes (no cheating in this time approximation, I swear).


6 shortbread cookies – pure butter, like those. Or, if you want to make them, here is the recipe.
8 Tbsp raspberry preserves
2.8 oz. raspberries, fresh or frozen
6 oz. mascarpone
2 eggs
3 Tbsp + 1 teaspoon sugar
½ tsp pistachio paste

Put a shortbread cookie in each glass.
Save 6 raspberries for the decoration and divide the rest into the glasses, along with the preserve.
Combine egg yolks and sugar and whisk until pale and thick, about 2 minutes. Stir in mascarpone and pistachio paste and whisk firmly until smooth.
In a separate bowl, whisk the egg whites until they have firm peak. Fold the egg whites into the mascarpone mixture using a large rubber spatula (carefully lift cream from the bottom of the bowl and pull it over the top, turning the bowl and repeating this until no foam remains visible). Divide cream between the 6 glasses, over the raspberries.
Sprinkle with shortbread crumbs and one raspberry, and refrigerate for 1 hour before serving.

Verrine framboise pistache
Pour 6 personnes

6 sablés bretons
8 cuillères à soupe de confiture de framboise
80g de framboises
175g de mascarpone
2 œufs
40g de sucre
½ cuillère à café de pâte de pistache

Placez un sablé breton dans le fond de chaque verre.
Réservez 6 framboises et répartissez ensuite le reste mélangé à la confiture.
Battez les 2 blancs en neige ferme. Dans un second bol, fouettez vigoureusement les jaunes avec le sucre jusqu’à ce que le mélange blanchisse. Ajoutez ensuite le mascarpone et la pâte de pistache en fouettant pour obtenir un mélange homogène. Incorporez ensuite délicatement les deux blancs à l’aide d’une spatule, en procédant en plusieurs fois. Versez cette crème dans chaque verrine, et laissez au réfrigérateur jusqu’au moment de servir. Décorez avec une framboise ou des miettes de sablé.
La suite, please

Hokkaido Squash Soup

By Mélanie, on Friday, January 30, 2009

P1000623

Do you remember when I told you I was very intrigued obsessed with winter squash? It seems to me it is the quintessential winter comfort food, putting you instantly in the right mood to enjoy the cold crisp air outside (and the warmth of your home). The possibilities are endless (galettes, salads, pies, risottos, etc…), and I’ve got so much to catch up!
So, as I attempted to cook for myself de bons petits plats (tasty little dishes), I naturally turned to the tempting Hokkaido squash at the farmer’s market. As long as making comfort food, why not going to the end of the concept, with a warm meal, simmered for hours… A SOUP. I know, I maybe watched Top Chef too much, and the continuous repetition of “Soup is good”, “Soup is love”, “Soup is the best test for a chef” finally totally brainwashed me, because I made my 4th soup in 2 weeks yesterday evening. Or I’m very cold. Or both actually…

P1000612P1000613

Anyway, when my guests asked for second helpings, I felt my mission was accomplished. And now, this is for you...

Roasted Hokkaido squash soup

1 2-pound Hokkaido squash peeled, seeded, chopped (about 1 pound once peeled and roasted)
1 celery stalk, chopped
½ onion, chopped
1 shallot
1 teaspoon oil
1 teaspoon coriander seeds
2 cups (or more) canned low-salt broth
Salt and pepper

Preheat oven to 400°F.
Roast squash, cut sides down, in an oiled roasting pan in middle of oven until tender, about 30 minutes. When cool enough to handle, scrape flesh from skin.
Heat oil in Dutch oven over medium-high heat. Add onions and shallots; cook until softened, about 2 minutes, before stirring in celery until tender. Add squash, broth and coriander seeds. Cover and simmer until pumpkin is very tender, about 20 minutes.
Purée soup in blender.
Season to taste with salt and pepper and serve.


Soupe au potimarron rôti

Le fait de rôtir le potimarron avant de le cuire à l’eau fait ressortir son goût de noisette, et permet un épluchage bien plus facile.
1 petit potimarron (environ 1kg entier – 500g de chair rôtie au four)
1 branche de céleri
½ oignon jaune
1 échalote
1 cuillère à café d’huile
1 cuillère de graines de coriandre
50 cl d’eau
1 bouillon cube dégraissé
Sel et poivre

Préchauffez le four à 200°.
Coupez le potimarron en 2. Videz les graines, et posez le dans un plat à four, face découpée en bas, en ajoutant un fond d’eau. Faites rôtir le potimarron pendant environ 30 minutes, jusqu’à ce que la chair soit tendre.
Pendant ce temps, émincez finement l’oignon, l’échalote et le céleri. Faites chauffer l’huile dans un fait-tout sur feu vif-moyen. Une fois chaude, versez-y les oignons et échalotes et faites revenir 2 mn avant d’ajouter le céleri. Baissez le feu, et laissez cuire.
Creusez la courge avec une cuillère et placez les avec les oignons, la coriandre et le bouillon-cube dans la casserole. Couvrez d'eau aux deux-tiers, et portez à ébullition.
Posez un couvercle et laissez cuire 20 mn à feu moyen.
Passez ensuite au mixer et rectifiez l'assaisonnement en sel et poivre.
La suite, please

About Nutella, or how to be deified by chocolate addicts

By Mélanie, on Tuesday, December 9, 2008

With all that time of silence, I could have come back with a long post. Apologizing for missing Thanksgiving and the preparation of Christmas cookies (and partly blaming work, health, and all those stuff that continue to keep me busy). Telling you about my wonderful week-end in London, trying to resist to the omnipresence of Christmas cookbooks. I still don’t know if the 3 books I carried in my backpack are a proof that I succeed or failed…. To my discharge, one of them was planned (and searched… in 5 libraries! So I will make sure to use Anita’s Field Guide to Cookies a lot as soon as the Christmas holidays start).

The thing is, since I’m no good at writing, it would have been even longer before I’d give you this new recipe. And, after seeing the tart disappear in less than 5 minutes, and being addressed by a group of 4 people with a “You made the nutella tart? It’s amazing! Can I have the recipe please?” I sort of understood this was urgent.

See, I made it for Juliette’s birthday, because I always get confused about the fruits she likes and doesn’t. But I have very clear memories of the many holidays we spent in Bretignolles. Breakfast with a gache vendéenne and nutella has always been part of it, so I was pretty sure she’d also enjoy the tart. It is creamy and crunchy thanks to the hazelnuts, but mostly rich and chocolaty, so that a simple bite brings you total satisfaction. Apparently, everyone thought so…


From Pierre Hermé

1 disk of sugar dough for the tart shell (here or there)
7 oz. nutella
5 oz. bittersweet chocolate
1 cup (2 sticks) butter
1 egg
3 yolks
2 Tbsp sugar
5 oz. Coarsely chopped hazelnuts

Preheat oven to 350°F.

Roll the disk of dough into an 12-inch circle, 1/4-inch thick, on a lightly floured surface. Line a 10-inch pie pan, leaving a 1-inch overhang.
Line shell with foil and fill with pie weights. Bake until edge is pale golden, about 12 minutes.
Spread nutella over bottom of the tart shell.
Stir chocolate and butter in heavy medium saucepan over low heat until melted and smooth. Remove from heat. Cool to lukewarm, stirring often. Stir the egg and yolks one into melted chocolate, one at a time. Whisk slowly, starting at the center and slowly working your way out in concentric circles until you have a smooth, shiny mixture. Finally incorporate sugar.
Pour filling into cooled crust, over the nutella. Sprinkle with chopped hazelnuts and bake until filling is set about 3 inches from edge but center is still wobbly, 11 minutes at 360°F. (Center will continue to set as tart cools.) Partly cool in pan on rack, about 30 minutes, before serving. This is also very good at room temperature.


Tarte au Nutella
De Pierre Hermé

1 fond de tarte sucrée (ici ou là)
200g de nutella
140g de chocolat noir
200g de beurre
1 œuf
3 jaunes
2 cuillères à soupe de sucre
140g de noisettes grossièrement hachées

Préchauffez le four à 180°.

Farinez abondamment le plan de travail ainsi que le rouleau à pâtisserie, puis étalez la pâte sur 2 à 3 mm d'épaisseur.
Etalez le disque de pâte en un cercle légèrement plus grand que votre moule à tarte (la recette a été réalisée avec un moule de 27cm). Foncez votre moule (beurré et fariné) avec la pâte et faites la précuire 12 minutes au four.

Tartinez le fond de la tarte avec le nutella. Réservez au frais.

Faites fondre le chocolat avec le beurre. Laissez refroidir légèrement (jusqu’à environ 40°). Incorporez délicatement l’œuf au chocolat. Utilisez une maryse pour éviter d’incorporer de l’air dans la ganache. Incorporez ensuite les jaunes un à un, puis le sucre.

Versez la ganache sur le nutella dans le fond de la tarte, et parsemez de noisettes grillées.
Faites cuire la tarte 11 minutes à 190°, juste assez pour que les bords soient fermes et le centre encore tremblotant.
Laissez refroidir dans le moule, environ 30 minutes, et servez tiède ou à température ambiante.
La suite, please

Playing with cookies

By Mélanie, on Sunday, November 23, 2008

I know, I know, I shouldn't play with food. But I could not resist to those cute little bears. And not only are they cute, they're really good too. I wasn't crazy about candies as a child, but those, oh, how I loved them! The marshmallow is so soft and sweet, coated with milk chocolate. If you don't know anything about the Oursons Guimauve, David Lebovitz's site will help you.
So when I saw them in the grocery store, I immediately knew I'd like to use them for my next baker's experiment.
Unfortunately, I think this must have looked like a horror movie for the poor little bears...

They were first cut in pieces, in order to be incorporated to a simple cookie dough. Then, they were refrigerated for a whole day (see, I also follow the rules I preach).
I was very curious to see how this would turn out after the cooking. First, they melted totally in the oven. But then the sugar of the marshmallow bubbled, and caramelized. Combined with the chocolate from the coating, it tasted like another delicious candy, the Michoko (I think it's like Heath bar? soft toffee coated in dark chocolate).

The thing is, they spread a lot. The caramel gets very flat, so the best is to reshape them into a disk when they're still warm. At this temperature, the caramel is malleable and forms strings, just like melting cheese. I was surprised, but, honestly, sticky and chewy cookies? I like that!! If you don't (why would you?), just wait a little. Once cold, you'll end up with a part cookie / part hard chocolate-caramel goody...


Marshmallows cookies

1 1/8 cups all-purpose flour
1/2 teaspoon baking soda
1/2 teaspoon salt
1 stick butter, room temperature
1/4 cup granulated sugar
1/2 cup packed brown sugar
1/2 vanilla pod
1 egg
1/2 cup semi-sweet chocolate morsels
4 oz “oursons en guimauve” (mini-marshmallows covered with milk chocolate)

Combine flour, baking soda and salt in small bowl. Beat butter, granulated sugar, brown sugar and vanilla extract in large mixer bowl until creamy. Add egg and flour mixture gradually. Stir in morsels and marshmallows. Press plastic wrap against dough and refrigerate for 24 to 36 hours.
Preheat oven to 350° F. Line the baking sheets with parchment paper. Scoop 2 1/2-ounce mounds of dough onto baking sheet. Bake until golden brown but still soft, 12 to 15 minutes. Transfer sheets to a wire rack for 10 minutes, then slip cookies onto another rack to cool a bit more. Repeat with remaining dough. Eat warm.


Cookies aux oursons en guimauve

150g de farine
1/2 cuillère à café de bicarbonate de soude
1/2 cuillère à café de sel
100g de beurre à temperature ambiante
50g de sucre
120g de sucre brun
1/2 gousse de vanille
1 oeuf
70g de pepites de chocolat noir
1 paquet de 120g d’oursons en guimauve

Mélangez la farine, la levure et le sel dans un saladier à part.
En utilisant la spatule de votre robot, travaillez le beurre ramolli avec les sucres jusqu'à ce que le mélange blanchisse. Ajoutez les graines de vanille, l’ œuf et le mélange à base de farine, en mélangeant bien après chaque addition. Incorporez ensuite les morceaux de chocolat et les oursons coupés en 4, en mélangeant avec une cuillère, pour ne pas les casser.
Couvrez la pâte d’un film plastique et réfrigérez 24 à 36 heures.
Préchauffez le four à 170°.
Tapissez les plaques à pâtisserie de papier sulfurisé. A l’aide d’une cuillère, faites des tas de pâte de la taille d’une petite balle de golf, et disposez les sur la plaque. Prenez soin de les espacer suffisamment pour ne pas qu’ils se collent entre eux lors de la cuisson. Enfournez pour environ 12 à 16 minutes. Laissez les refroidir quelques minutes avant de les transférer sur une grille.
Dégustez les encore chauds.
La suite, please

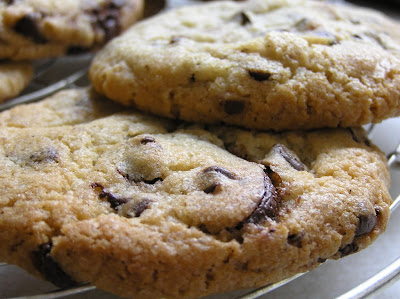
As promised... the cookies!

By Mélanie, on Monday, September 15, 2008

I know. I’m bad. I show you this picture of cookies, and then leave you without anything for almost a month.
So here we go!
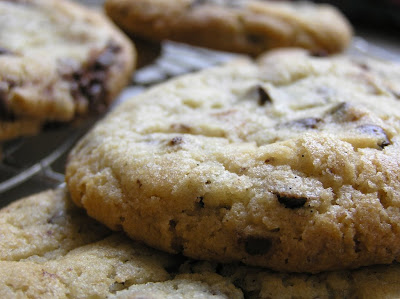
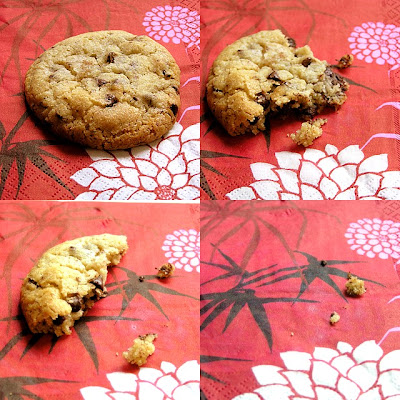
But first I need to tell you that there’s something between me and cookies. At least that’s what my entourage thinks... As if I was the reference or something like that. I even have a friend whose colleagues ask if they’re going to have some of my cookies soon. Weird, isn’t it?
Because to be honest, I don’t know why. I don't deserve it. I don't do anything special, they're not extraordinary. I haven’t found the recipe yet. And because I find it difficult to resist to cookie dough (yes, I'll admit it. I first started cooking because I prefered the batter to the baked cake...), my hips thank me for not making them so often. Ok, that’s still more frequently than most of the people I know, but if you look the ratio “number of time I bake cookies / number of time I bake” (nobody’s against statistics right?), I’m clearly not on top.

So I thought of many explanations. Like the fact that I lived in the US for a few months. Or the fact that I’m the one cooking all those American classics that sometimes sound strange to French people (bread made of zucchinis? And muffins with carrots? Without speaking of cakes with cream cheese?...). Or the fact that half of my recipes are American ones (a 2 years subscription to Bon Appetit helped that), which means that I have dozens of different cookies recipes. So basically that I love the US, including the food, and what are cookies if not typically American?

But some people don’t know that. And even less do they know that I used to make and sell huge cookies in a bakery during my first stay in the US. We had peanut butter, M&M’s, molasses, chocolate chips, oatmeal raisins... It had become such a routine, cutting the dough, weighting, putting 5 M&M’s on every cookies, baking, etc... But this was nothing compared to the thousands of donuts I prepared, and that’s what I talk about when I think about my work in this restaurant.

So I guess the real reason for my cookies to be appreciated is that, when I make them, I prepare a lot of different kinds.
This way:
- People are happy because it gives them an excuse to eat a lot of cookies : they’ve got to try all the flavours!
- I can satisfy every one : even if you don’t like peanut butter, or raisins, or cinnamon, or white chocolate, you’ll still find something that doesn’t contain those ingredients.
- They seem to taste better (and this is tricky!) : even if they’re not that good, there’s always one that you prefer, and what you remember is “oh yeah, these were really standing out”. Actually, this is a very new theory of my own, but I’m sure it works!

I know what you’re thinking. You’re not crazy like me, you don’t want to spend hours in the kitchen, preparing four kinds of different cookies (four times more work, four time more dishes to wash!). But I don’t either! This is even the best part about cookies: it allows me to be lazy. I just double a basic dough recipe (like this one), divide the dough in 3 or 4 bowls, and add whatever I have on hand, depending on my inspiration: white chocolate & cranberries, cocoa & hazelnuts, oatmeal & chocolate chips, coffee and marshmallows (interesting results btw) and so on...
I know it’s not perfect, some combination should require more or less sugar or flour, but it works pretty fine.

So now you understand how captivated I was when reading this article from the NY Times. The key to the perfect cookies? Yes please! I could become a superstar with that! Or not... But I guess just having people enjoying a little more my cookies will be enough for me.

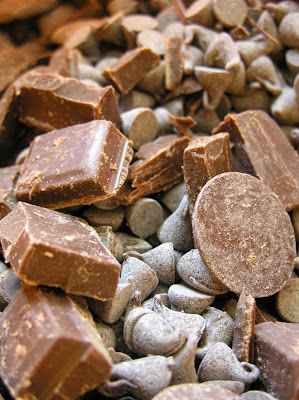
One month passed before I could try them. I wanted enough time & people to make a complete and scientific test. Because this is not (only) about the recipe. It’s about the secrets to make them better. Waiting 36 hours before baking. Using chocolate disks instead of chips or chunks. Jumbo sizing them. This is not what I’m used to. And I needed to compare on each of these criteria and see by myself if this was really making a difference.

Here are the results :

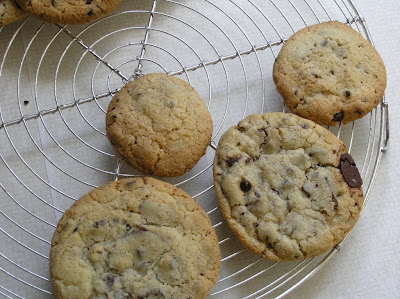
- Waiting 36 hours : just as in the article, I divided the dough in three batches, one baked immediately, one after 24 hours in the fridge, and the last one after 45 hours. And it is true that the texture was quite better. The 45 hours cookies were more crumbly on the edge, browner and crispier. This made the difference with the soft and chewy centre more noticeable. From now on, I will definitively prepare the dough at least one day in advance.

- Using chocolate disks : I did not have enough chocolate disks and completed with chunks and chips. We did not like the use of the dark chocolate disks : they were too big and too strong, and concealed the taste of the cookies. In our opinion, the chunks were the perfect size, but if you’re a chocolate addict, you might disagree with us.

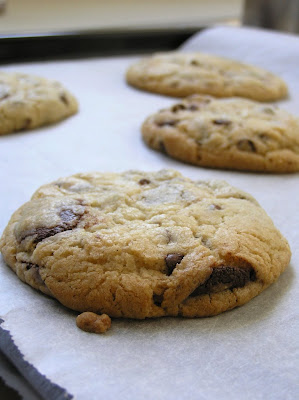
- Jumbo size : Wow, when I first read six inches (and converted it in centimetres! a.k.a. 15 cm), I was incredulous. And what, bake them 4 by 4, because they don’t fit in the baking pan? Is this just about wanting everything big, just like the serving size in the restaurants? Well, I was wrong. Size is important. The smaller ones were hard once at room temperature, while the bigger ones (especially the 24h batch) became a little chewy in the inside. It depends on the texture you want to achieve... In my family, they’re gonna be jumbo size now!

<

This is the recipe inspired from the NY Times, but the previous advices could be applied to any other...
Chocolate Chip Cookies
2 2/3 cups flour
1 1/4 teaspoons baking soda
1 1/2 teaspoons baking powder
1 1/2 teaspoons coarse salt
2 1/2 sticks (1 ¼ cups) unsalted butter
1 1/8 cups brown sugar
1 1/8 cups sugar
2 large eggs
1 vanilla pod
1 pounds bittersweet chocolate chunks
Sea salt.

Sift flour, baking soda, baking powder and salt into a bowl.
Using your mixer, cream butter and sugars together. Add eggs, one at a time, mixing well after each addition. Stir in the vanilla. Reduce speed to low, add dry ingredients and mix until just combined, 5 to 10 seconds. Drop chocolate pieces in and incorporate them without breaking them. Press plastic wrap against dough and refrigerate for 24 to 36 hours. Dough may be used in batches, and can be refrigerated for up to 72 hours.
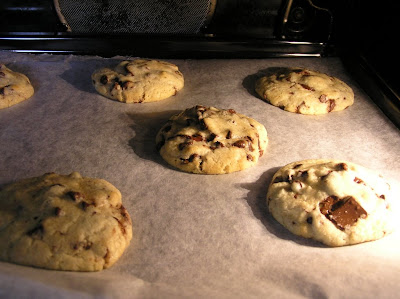
Preheat oven to 350 degrees. Line the baking sheets with parchment paper. Scoop 3 1/2-ounce mounds of dough (the size of generous golf balls) onto baking sheet. Sprinkle lightly with sea salt and bake until golden brown but still soft, 15 to 20 minutes. Transfer sheets to a wire rack for 10 minutes, then slip cookies onto another rack to cool a bit more. Repeat with remaining dough. Eat warm.


Cookies aux pépites de chocolat

480g de farine
3 cuillères à café de levure
1 cuillère à café de sel
250g de beurre à température ambiante
280g de sucre brun
225g de sucre
2 oeufs
1 gousse de vanille
400g de chocolat, grossièrement brisé
Fleur de sel

Mélangez la farine, la levure et le sel dans un saladier à part.
En utilisant la spatule de votre robot, travaillez le beurre ramolli avec les sucres jusqu'à ce que le mélange blanchisse. Ajoutez les graines de vanille et les oeufs, un par un, en mélangeant bien après chaque addition. Réduisez la vitesse du robot et ajoutez le mélange à base de farine. Ne travaillez pas trop la pâte (environ 15 secondes). Incorporez ensuite les morceaux de chocolat en mélangeant avec une cuillère, pour ne pas les casser.
Couvrez la pâte d’un film plastique et réfrigérez 24 à 36 heures. La pâte peut être utilisée en plusieurs fois et peut être réfrigérée jusqu'à 72 heures.
Préchauffez le four à 170°.
Tapissez les plaques à pâtisserie de papier sulfurisé. A l’aide d’une cuillère à glace (ou d’une grosse cuillère), faites des tas de pâte de la taille d’une balle de golf, et disposez les sur la plaque. Prenez soin de les espacer suffisamment pour ne pas qu’ils se collent entre eux lors de la cuisson. Saupoudrez légèrement de fleur de sel et enfournez pour environ 15 à 20 minutes. Plus les cookies seront colorés, plus ils seront secs. Si vous les aimez moelleux avec le cœur pâteux, sortez les du four lorsque le milieu du cookie est encore clair.
Laissez les refroidir quelques minutes avant de les transférer sur une grille.
Dégustez les encore chauds.
La suite, please

Chocolate Tart

By Mélanie, on Monday, September 1, 2008

You know I told you I'm always trying new recipes, and therefore never making the same meal twice.
Well, every rule has its exception.
Actually, there's two exceptions. Both are from the book : Le meilleur et le plus simple de Joel Robuchon (the best and easiest from Joel Robuchon). The chocolate tart, and the opened apple pie.
I don't know for how long we have been making this recipe, my mother or me. At least 12 years. And as it is good and so easy to make (hence the title of the book!), we've been preparing it a lot.And I know it by heart...


Chocolate tart

1 pâte sucrée shell (from my almond and plum pie) / 1 fond de tarte en pâte sablée ou sucrée
7 oz. non bitter chocolate / 200g de chocolat
3/4 cup whipping cream / 20cl de crème fleurette
1/3 cup milk / 8 cl de lait
1 egg

Preheat oven to 350°F (180°C)

Roll the disk of dough into an 12-inch circle, 1/4-inch thick, on a lightly floured surface. Line a 10-inch pie pan, leaving a 1-inch overhang.
Line shell with foil and fill with pie weights. Bake until edge is pale golden, about 10 minutes.

While crust bakes, bring the cream and the milk to boil in a small saucepan. Remove from heat, and put the chocolate in the cream. Whisk until the chocolate is melted. Then add the egg and mix until homogenous.

Once the crust is baked, pour chocolate filling over the tart shell. Put pan on a baking sheet and bake 15 to 20 minutes. Cool tart completely in pan on a rack before unmolding and serving. La suite, please

Light please
By Mélanie, on Wednesday, July 30, 2008


Wow. I did not see that coming! I was so concerned with my first post, taking many pictures, that I did not imagine the following would cause any trouble. I mean, I have many recipes to share! So the only problem I could have would be to choose one!

Well, it doesn’t work that way… For the past few weeks, I have been trying to take pictures of the cakes I made. Except that, with this rule of “I can never be happy with the result of what I did” (yeah, I know, I’ve really got to do something about this one!), I faced two problems. Either the cake looked beautiful, but tasted just… ok (it’s got sugar in it, by definition, it cannot taste bad!), either it was good, but the pictures were horrible. “Why care?” could you say, “you shouldn’t judge a book by its cover”. But they were really ugly. Like, you would never have tried the recipe!

I needed some inspiration. And while thinking of this, I started to prepare my dinner. Summer has finally arrived in Paris, with more than 10 days of sunshine and hot weather, and salads are just the nicest way to celebrate this. Just smelling the odour of fresh tomatoes or basil reminds me of holidays and keeps my mood high. Plus, it just fits with the “I’ll be in a bikini at the beach in exactly one week” thought. (Which is not bad either). I had some cherry tomatoes on the balcony, added them to the haricots verts and corn, and voilà!

And this evening, eating this salad was like a flash of lightening. Why hasn’t anybody told me before that corn tastes so good with green beans?!? I did not know that! [Feel my indignation...]. So maybe you were aware of this fact, but if not, I will not be to blame for keeping the secret :

Haricot vert and corn summer salad
for 2

½ pound green beans
1 cup corn kernels (either fresh, shaved from the cob, or in a can)
1 cup cherry tomatoes half a romaine lettuce
2 oz. feta or goat cheese
3 Tbsp olive oil
2 Tbsp red wine vinegar
1 tsp Dijon mustard
1 Tbsp shallot, finely diced
1 Tbsp basil, chopped
salt & pepper

To prepare dressing, combine oil, vinegar, mustard and shallot, stirring with a whisk. Add salt and pepper to taste.

Cook the beans in boiling water, about 7 minutes. Drain and plunge in ice water to stop the cooking, then drain.
Place beans in a large bowl. Add torn romaine leaves, corn, feta and tomatoes. Drizzle with dressing.

Salade d'été aux haricots vert et au maïs
pour 2

250g de haricots verts
1 demi romaine
1 petite boite de mais
Une quinzaine de tomates cerises
50 g de feta émiettée

3 cuillères à soupe d'huile d'olive
2 cuillères à soupe de vinaigre de vin rouge
1 cuillère à café de moutarde
1 cuillère à soupe d'échalote finement émincée
1 cuillère à soupe de basilic ciselé
Sel et poivre

Préparez la vinaigrette en émulsionnant l'huile, le vinaigre et la moutarde. Rajoutez l'échalote et le basilic. Salez et poivrez à votre goût.

Faites cuire les haricots verts dans l'eau bouillante, environ 7 minutes à partir de la reprise d'ébullition. Egouttez les et passez les sous l'eau froide pour stopper la cuisson.
Dans un grand bol, mélangez les feuilles de salade, les haricots, le maïs, les tomates et la feta, et ajoutez la vinaigrette.


La suite, please